Prerequisites
To complete this guide, you will need the following:- Apple Developer membership (to obtain the required permissions to send push notifications).
- A machine running MacOS to work on building the Flutter app for iOS devices.
- Firebase account
- Novu account.
- Android Studio configured with Dart and Flutter plugins.
- Xcode installed on your machine.
Set up and Create a Flutter App
If you have an existing Flutter App, you can skip this step. If you are creating a brand new Flutter app, please follow this guide.Set up Firebase and FlutterFire
Please follow this guide to set up a Firebase project and integrate Firebase Cloud Messaging in your Flutter app.Set Up Apple Integration
Please follow this guide to ensure that everything is set up on your iOS device to receive messages. There is an optional section about allowing Notification Images. Follow the steps to install and activate the notification service extension. We’ll need it later in this guide to display images as part of the push notifications from FCM.Set Up FCM Notification Permission & Registration Token
We’ll add code to initialize Firebase and ask the user’s permission to receive notifications. Open up thelib/main.dart file in your Flutter app and replace everything with the code below:
The Request permission code block
This shows the notification permission prompt to the user when the user interacts with the app for the first time. If the user allows it, then we can get a token.
Registering and obtaining the FCM token for the device
A device’s token is needed for the specific device to receive messages. The
getToken() returns the registration token for the app instance on the device.The foreground message handler
This handler listens to when a push notification is sent from FCM to the device. If the app is in the foreground, then it prints out the notification title, body, messageId, and data properties to the console.
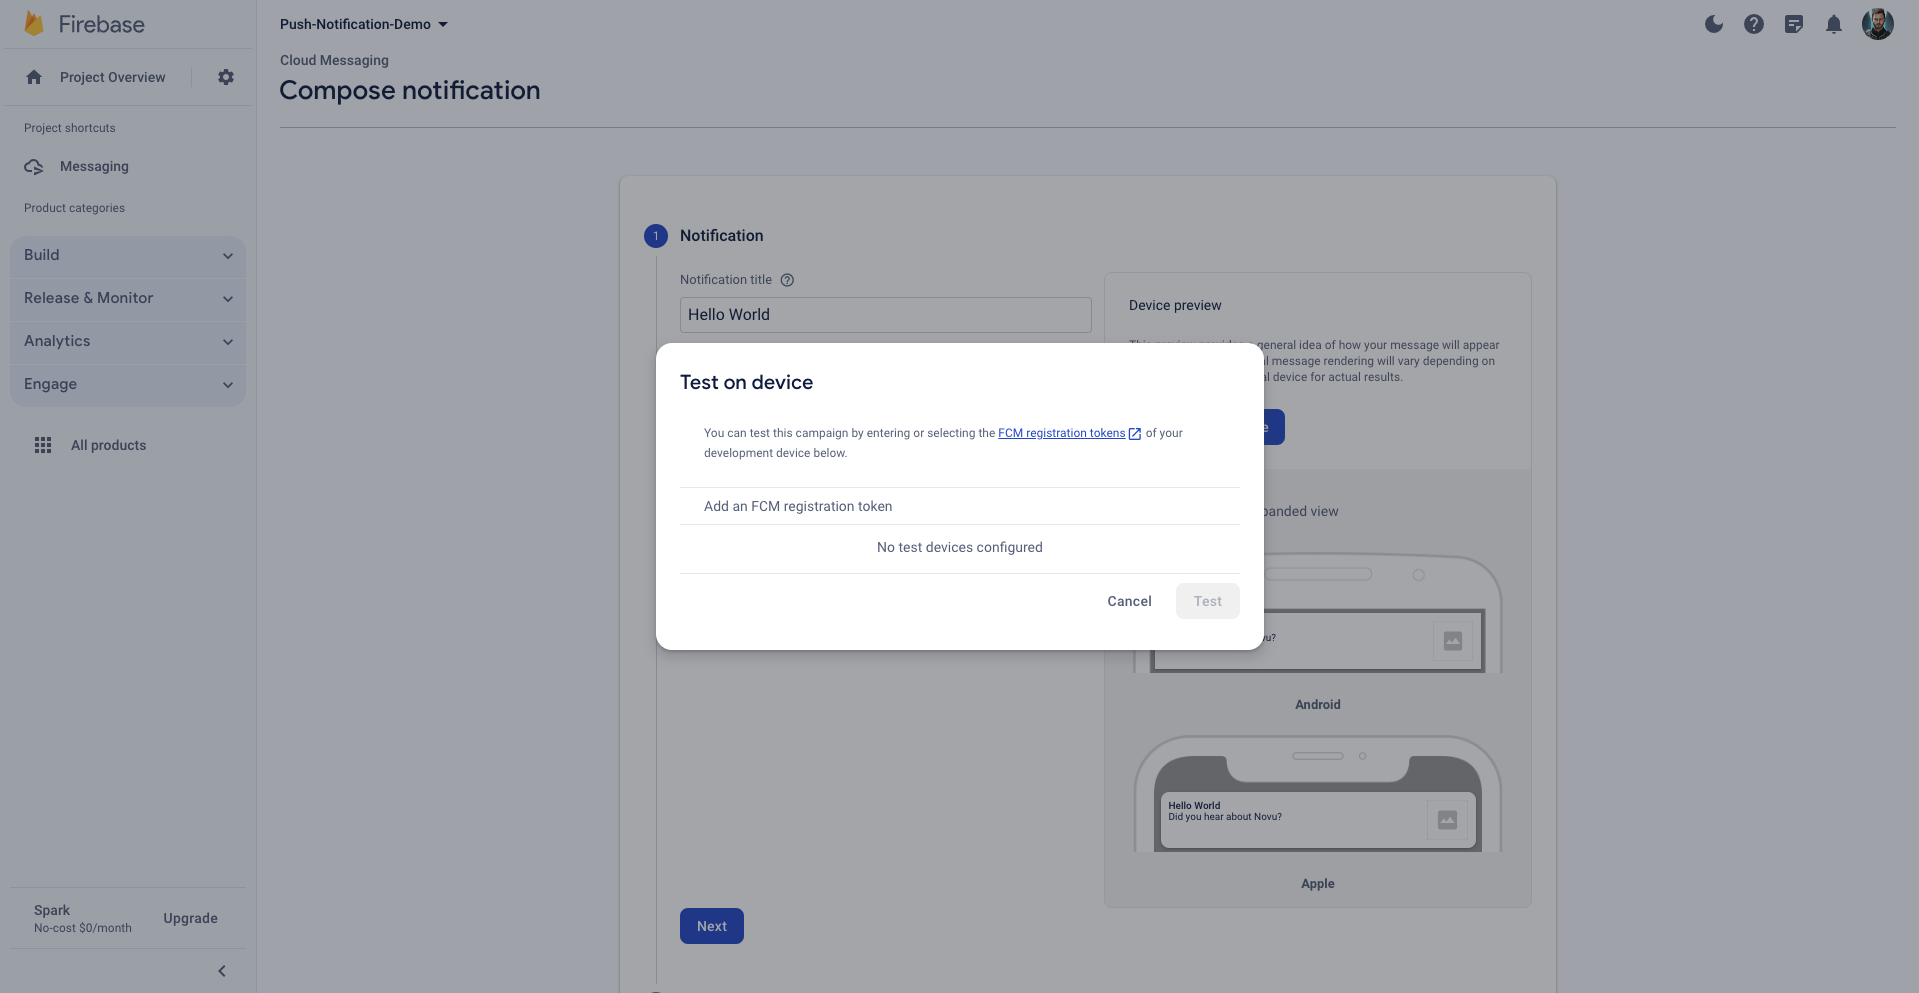
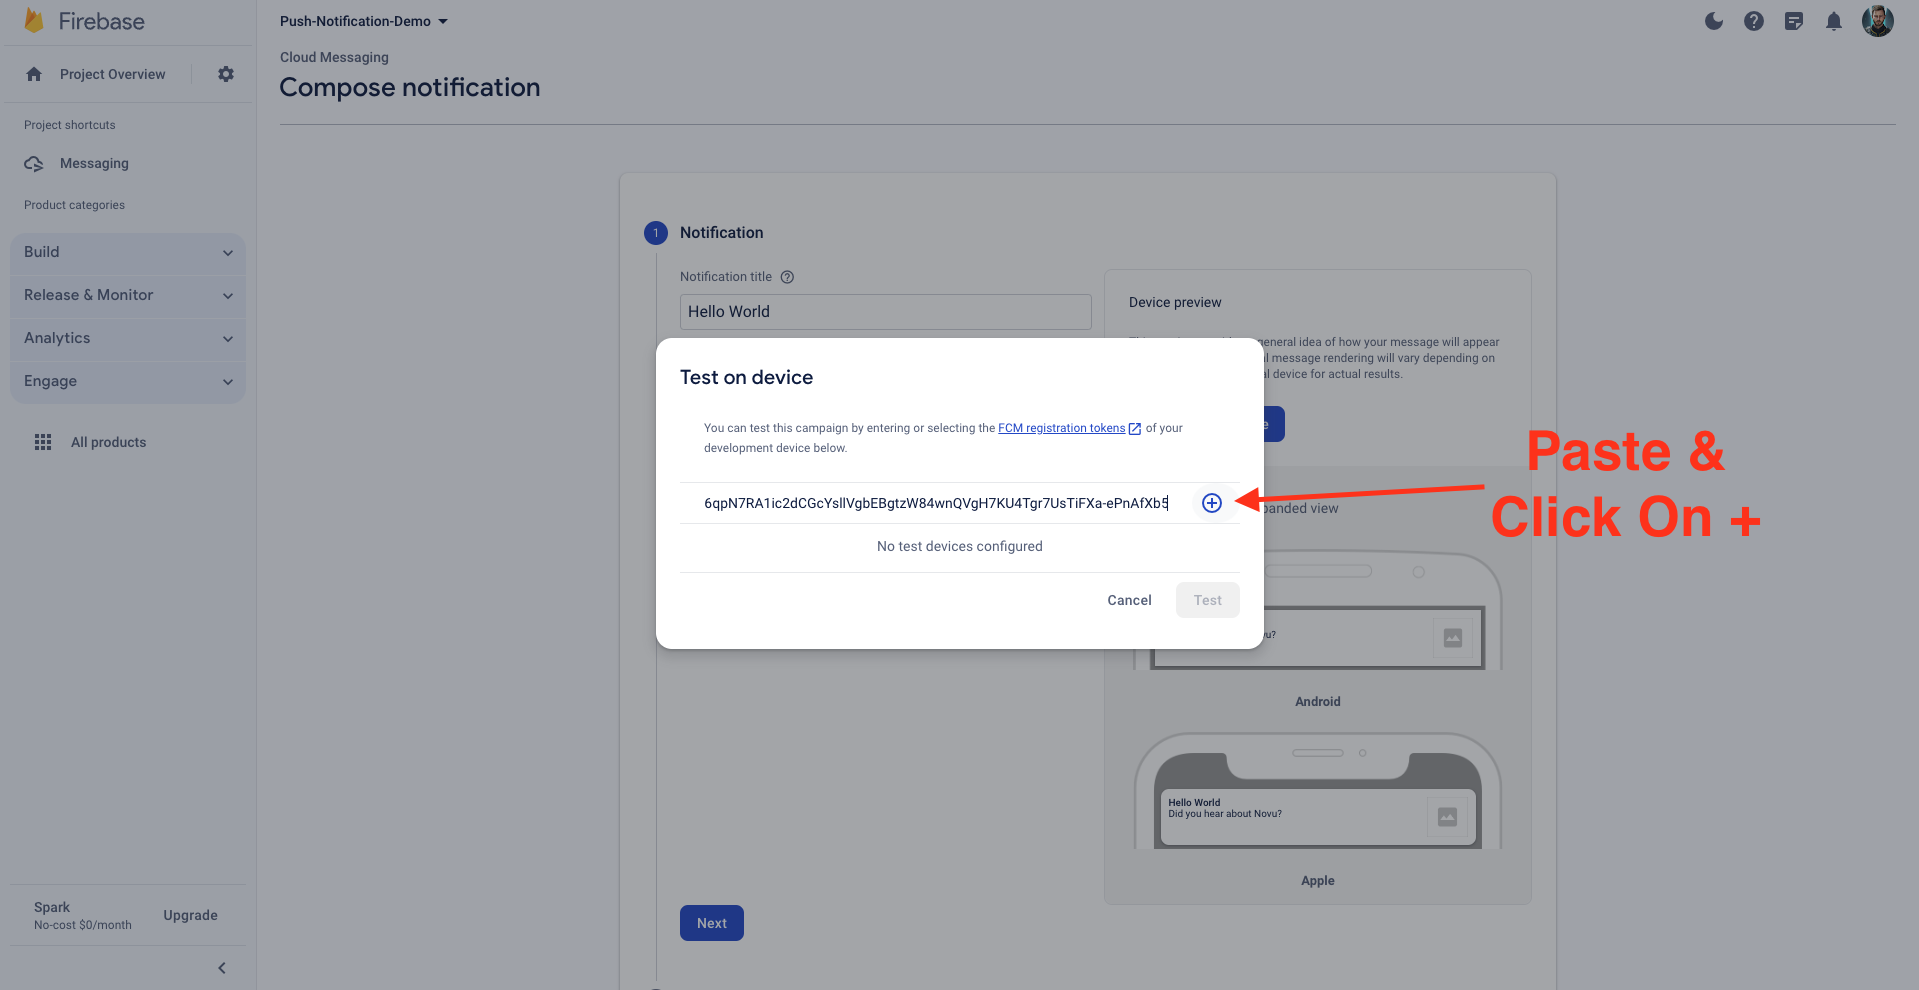
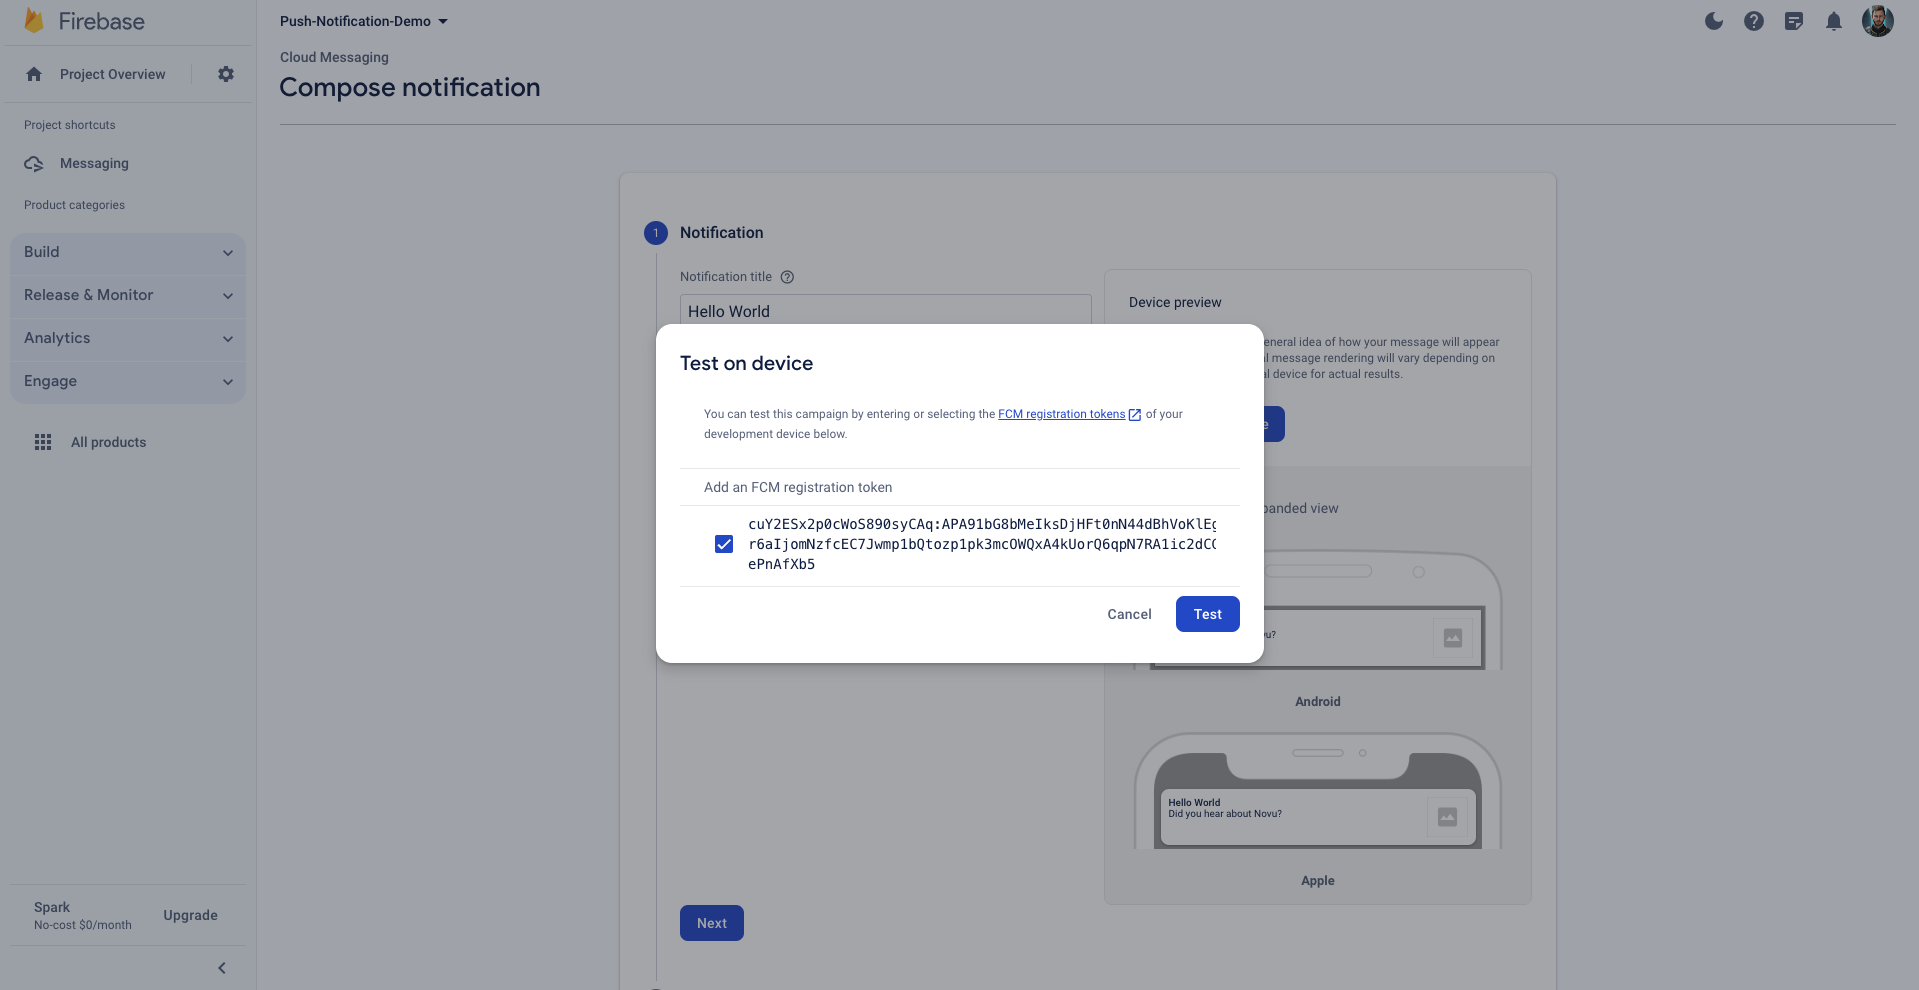
Cloud Message Test
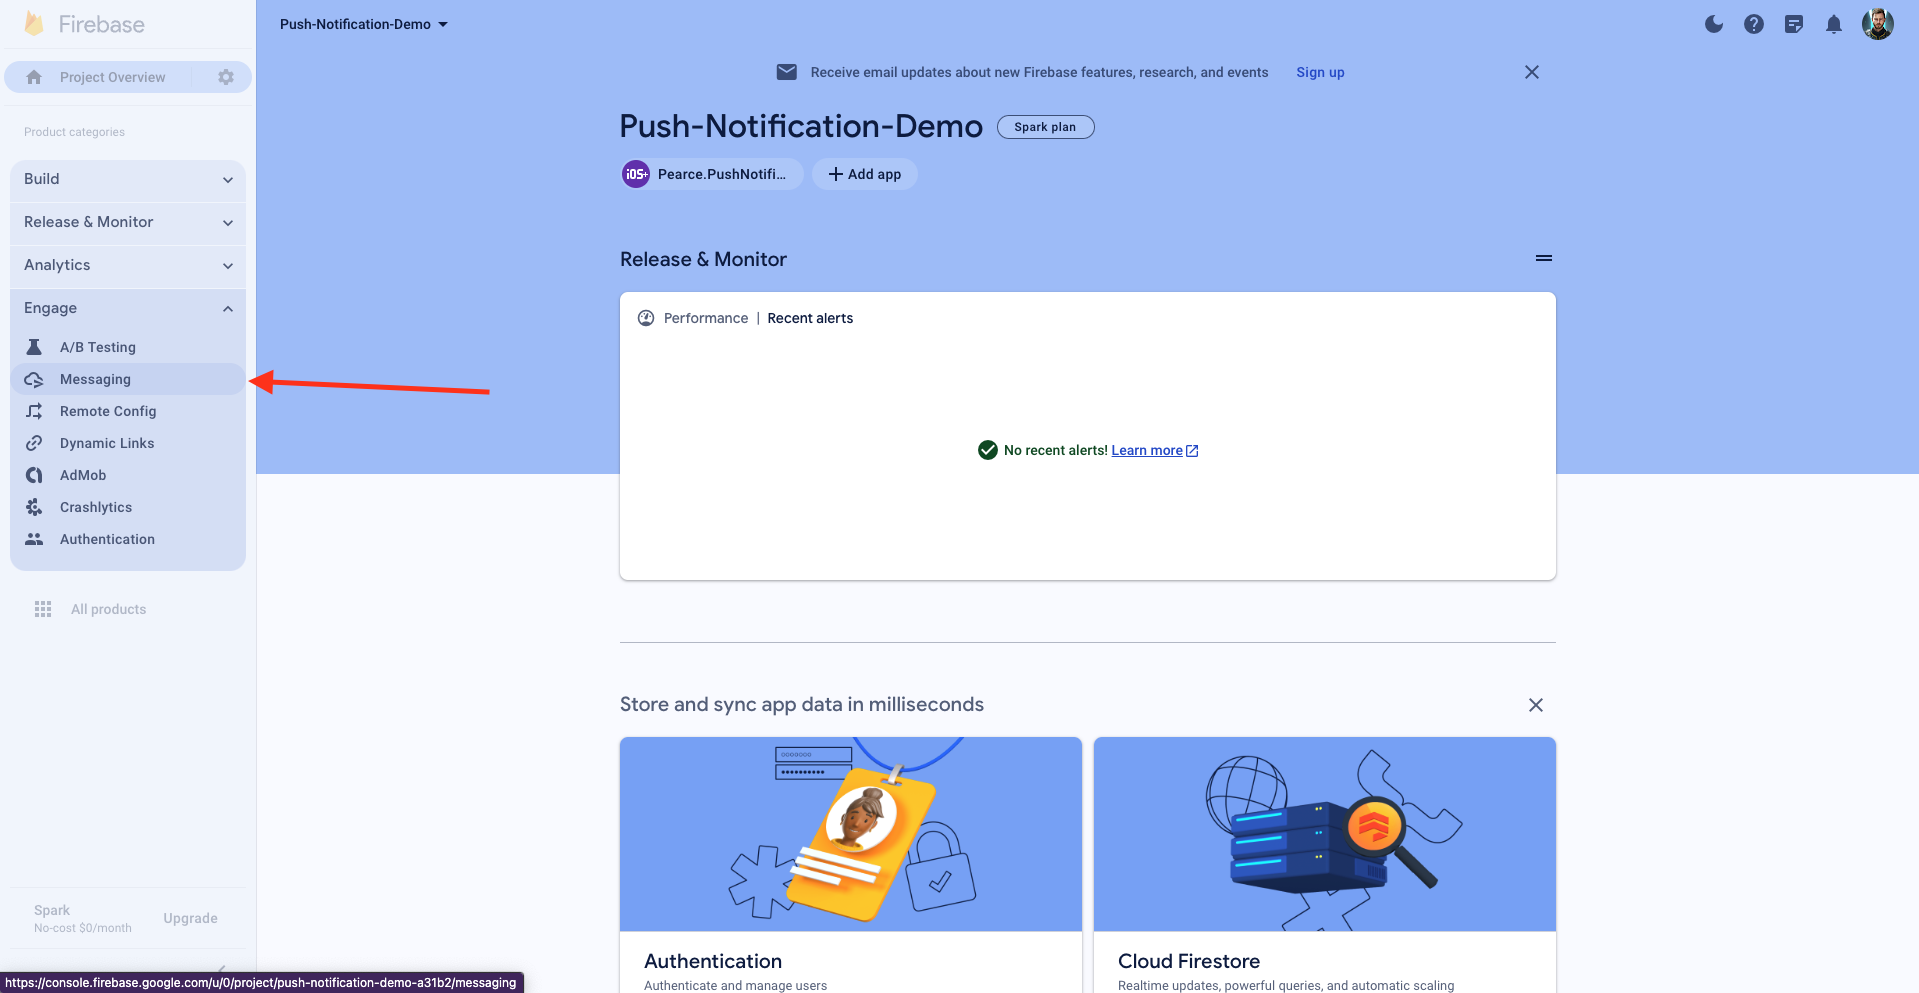
In your Firebase project, navigate toEngage section and click on Messaging.
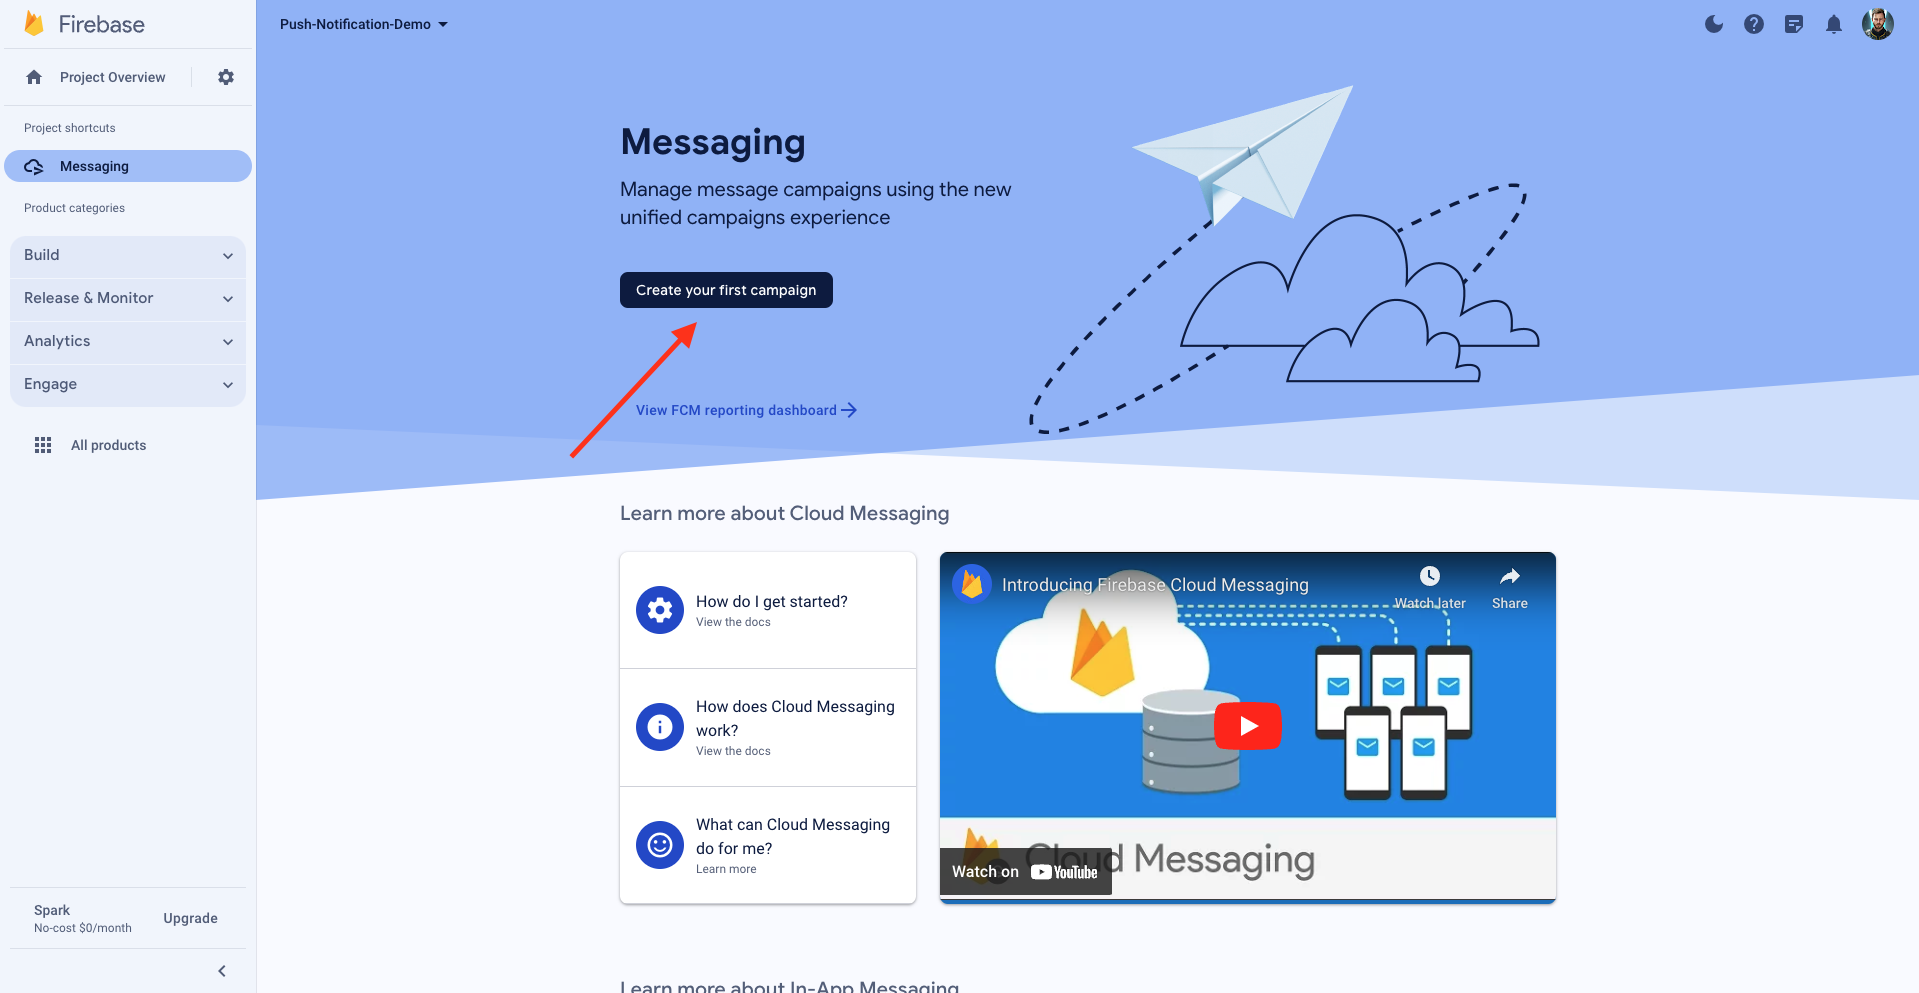
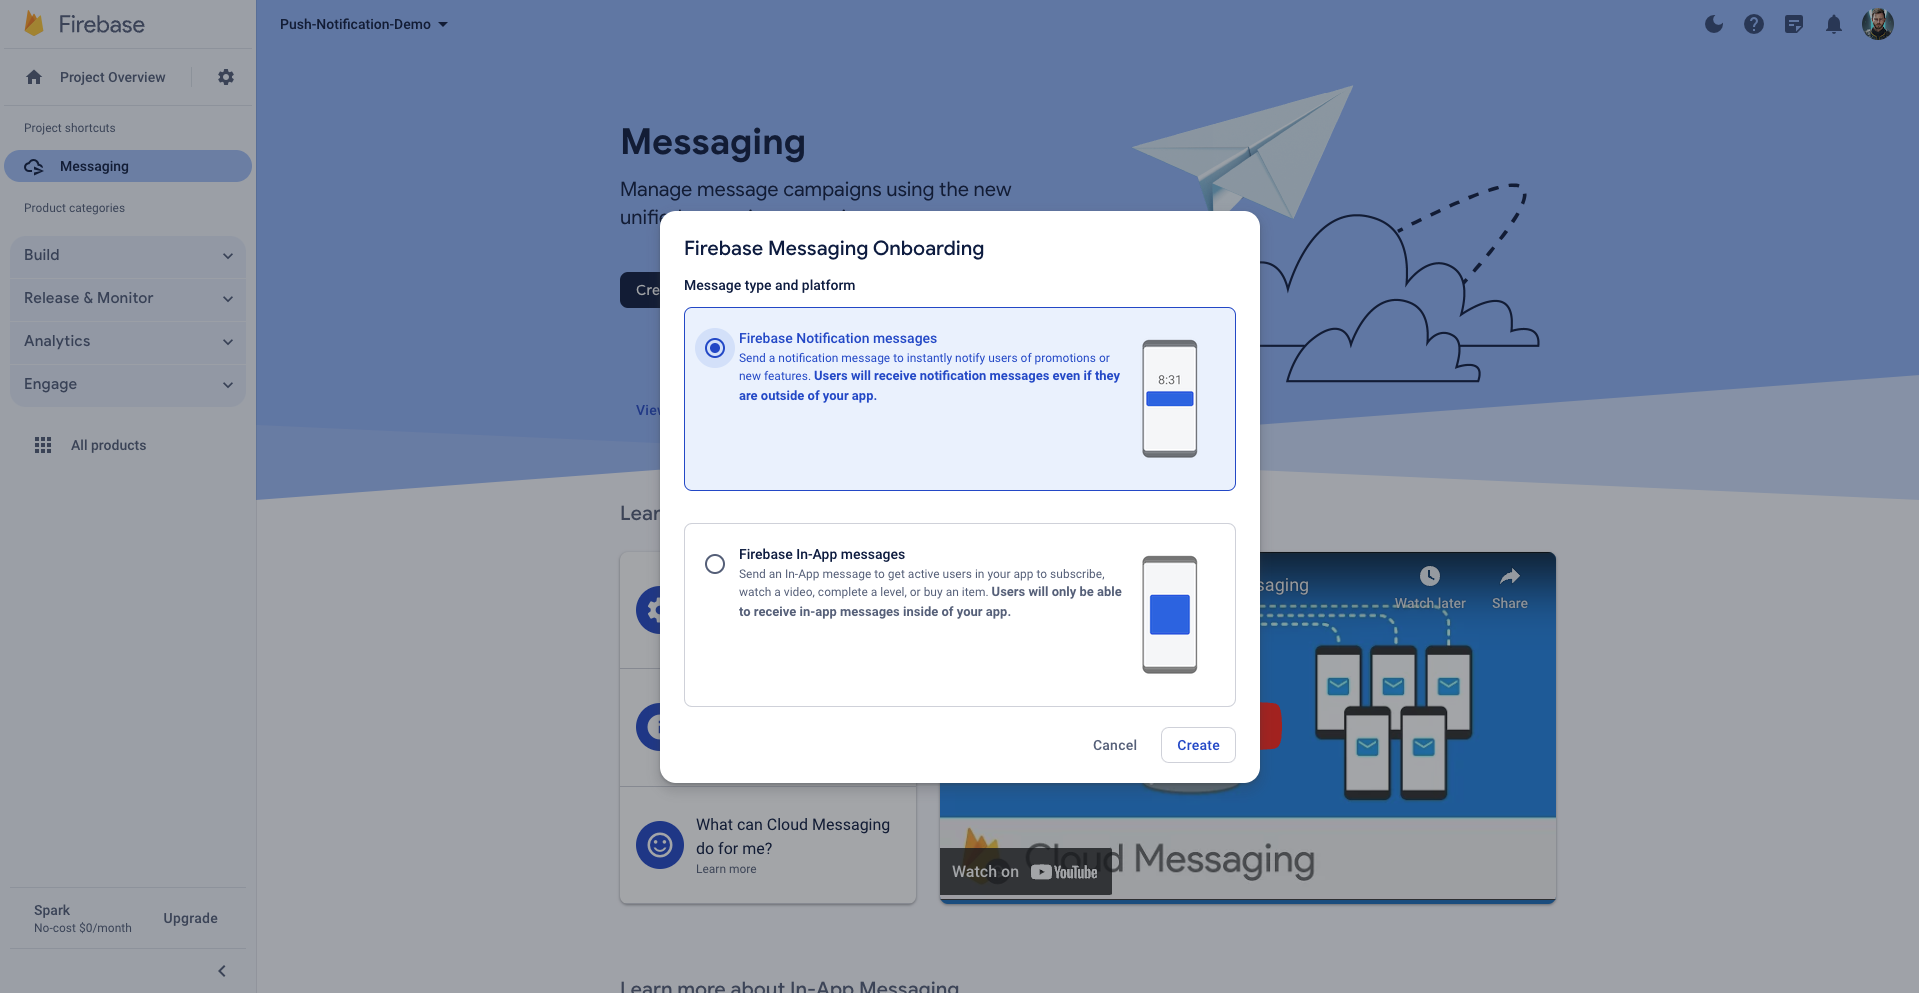
Create your first campaign and select Firebase Notification messages.
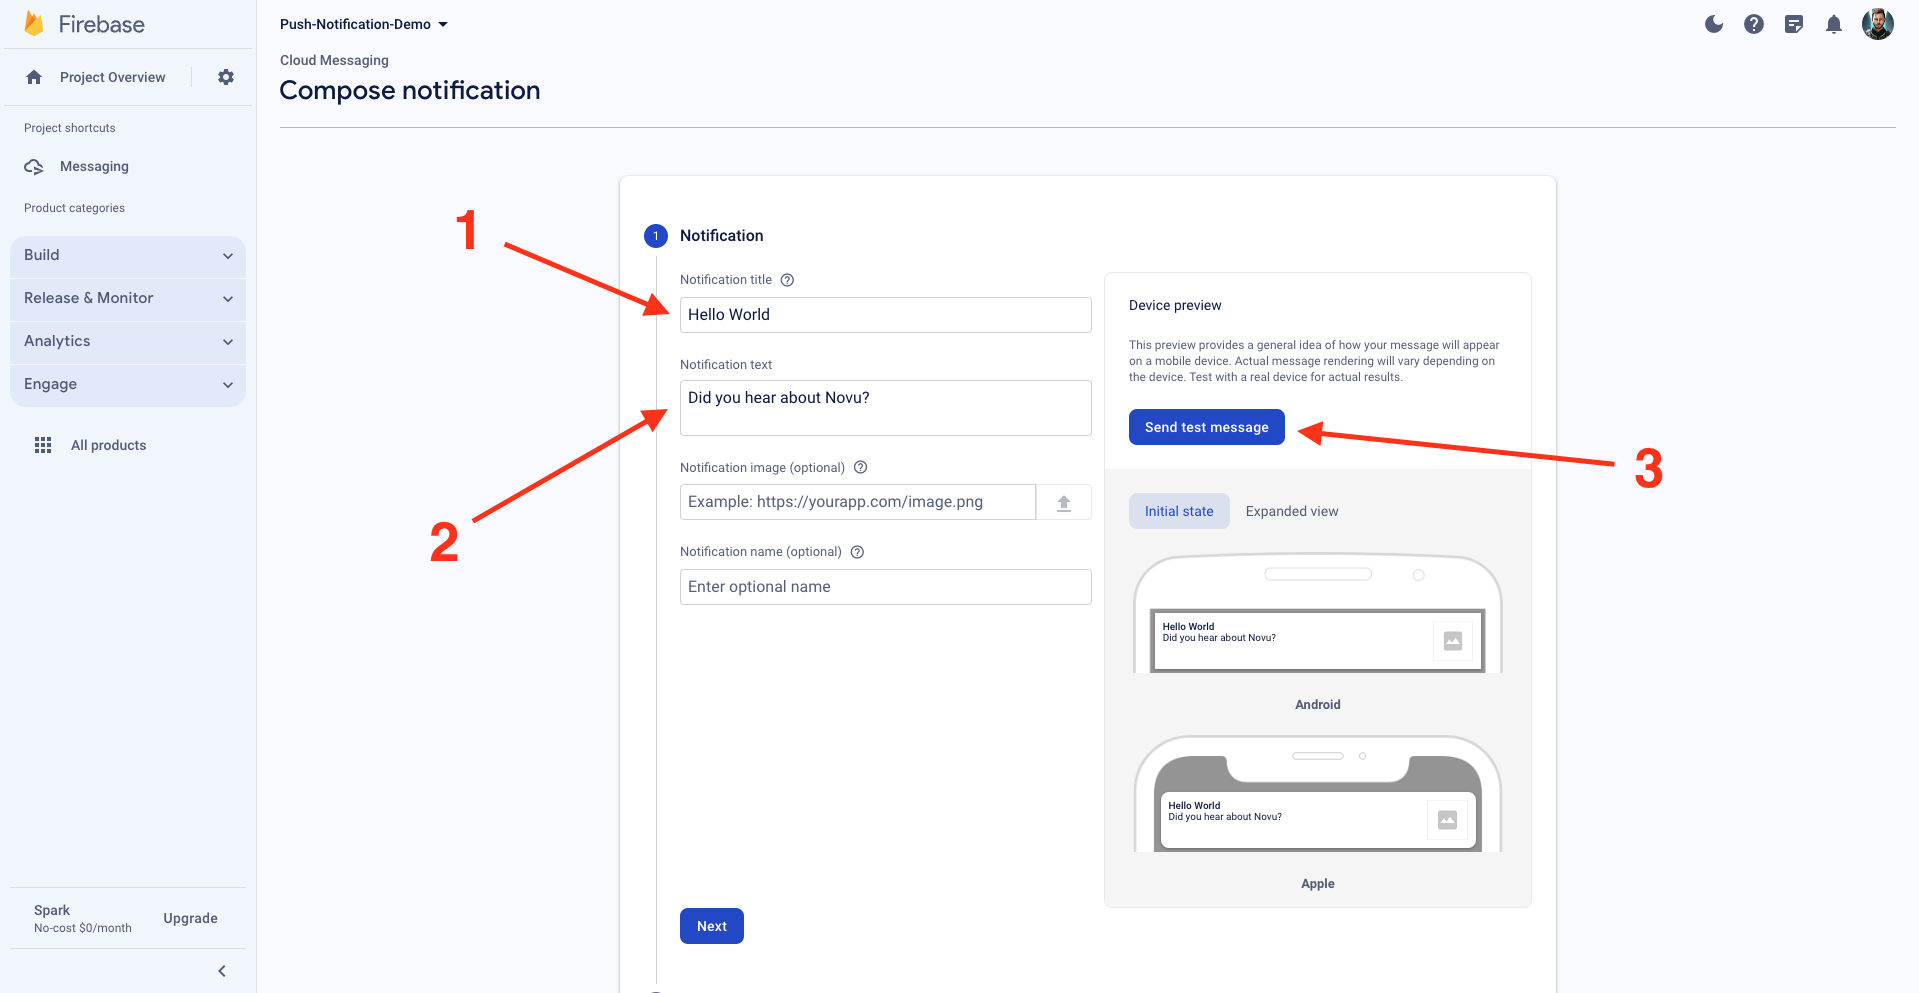
Notification title and the Nabigateotification text, and click on Send test message.
Sign Up on Novu
Let’s use Novu to fire push notifications via FCM. First, sign up on Novu Cloud?utm_campaign=docs-gs-guides-fc-flutter.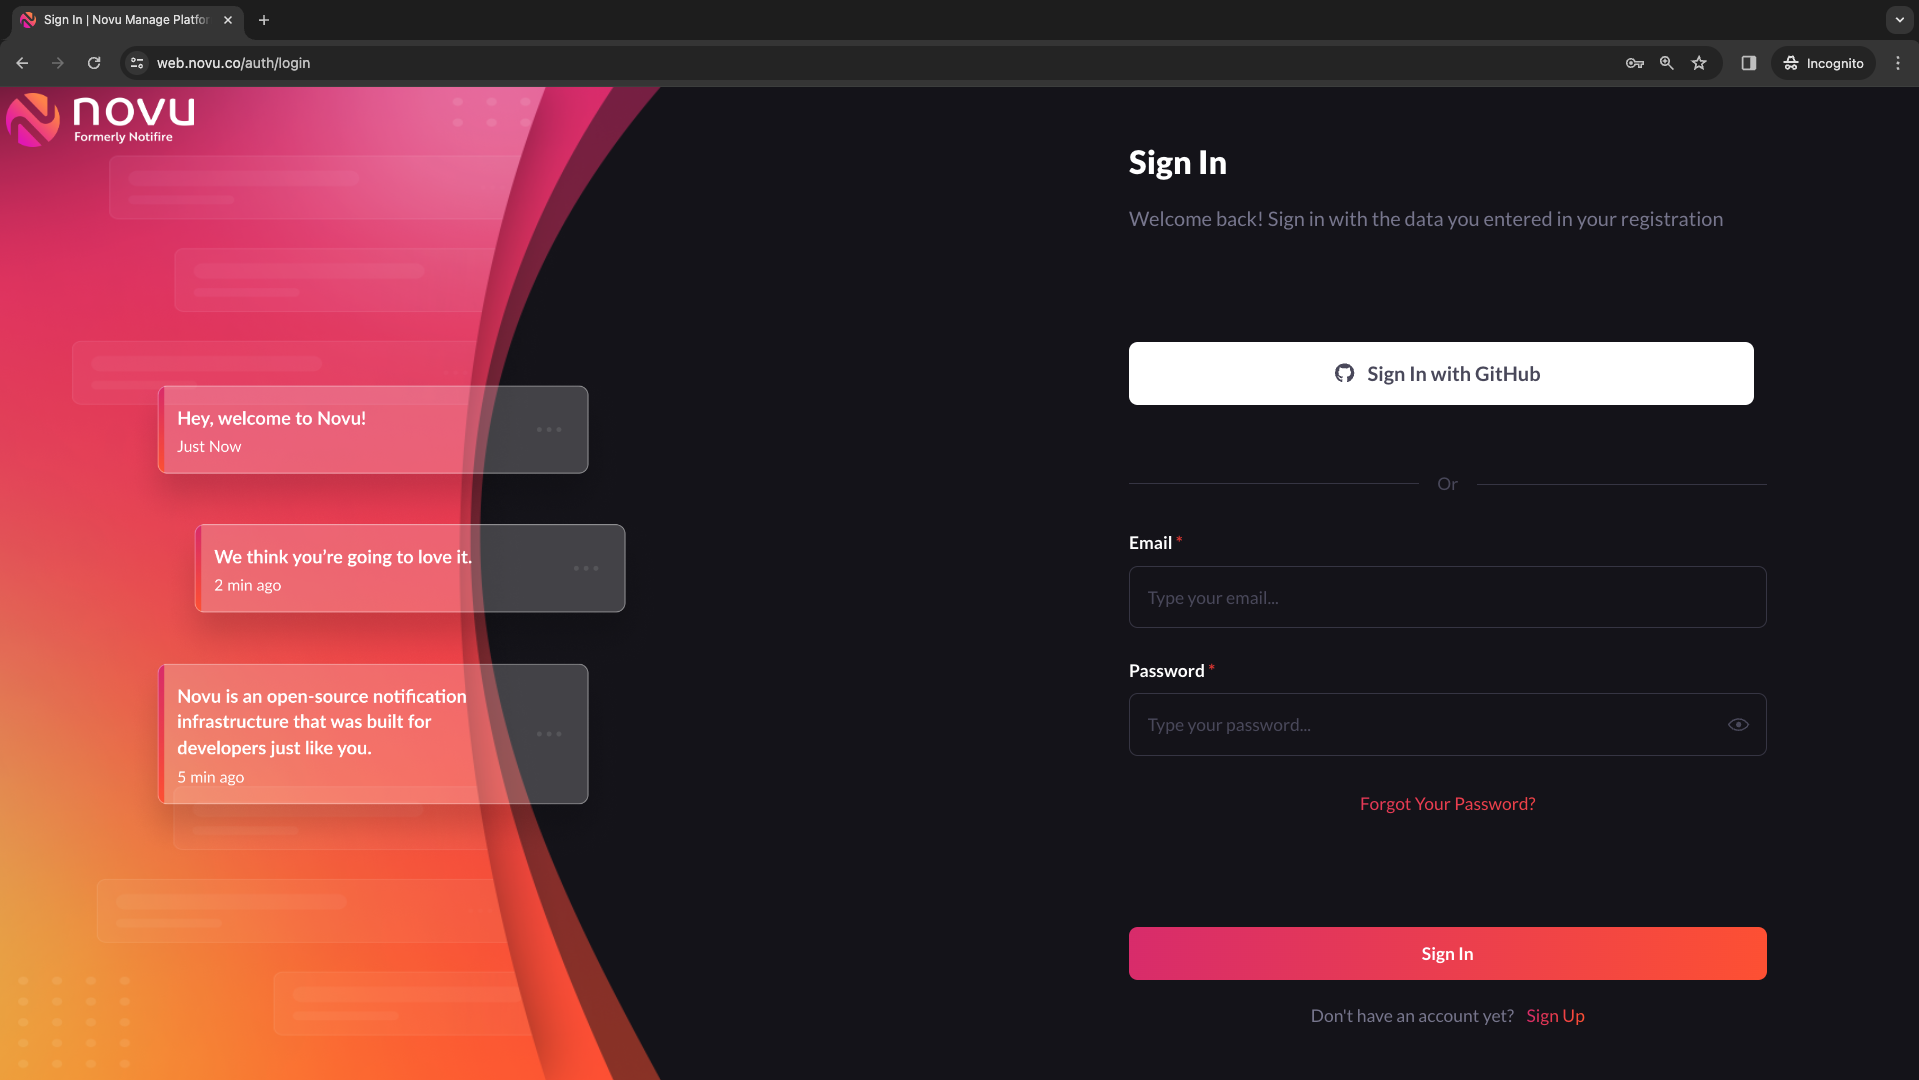
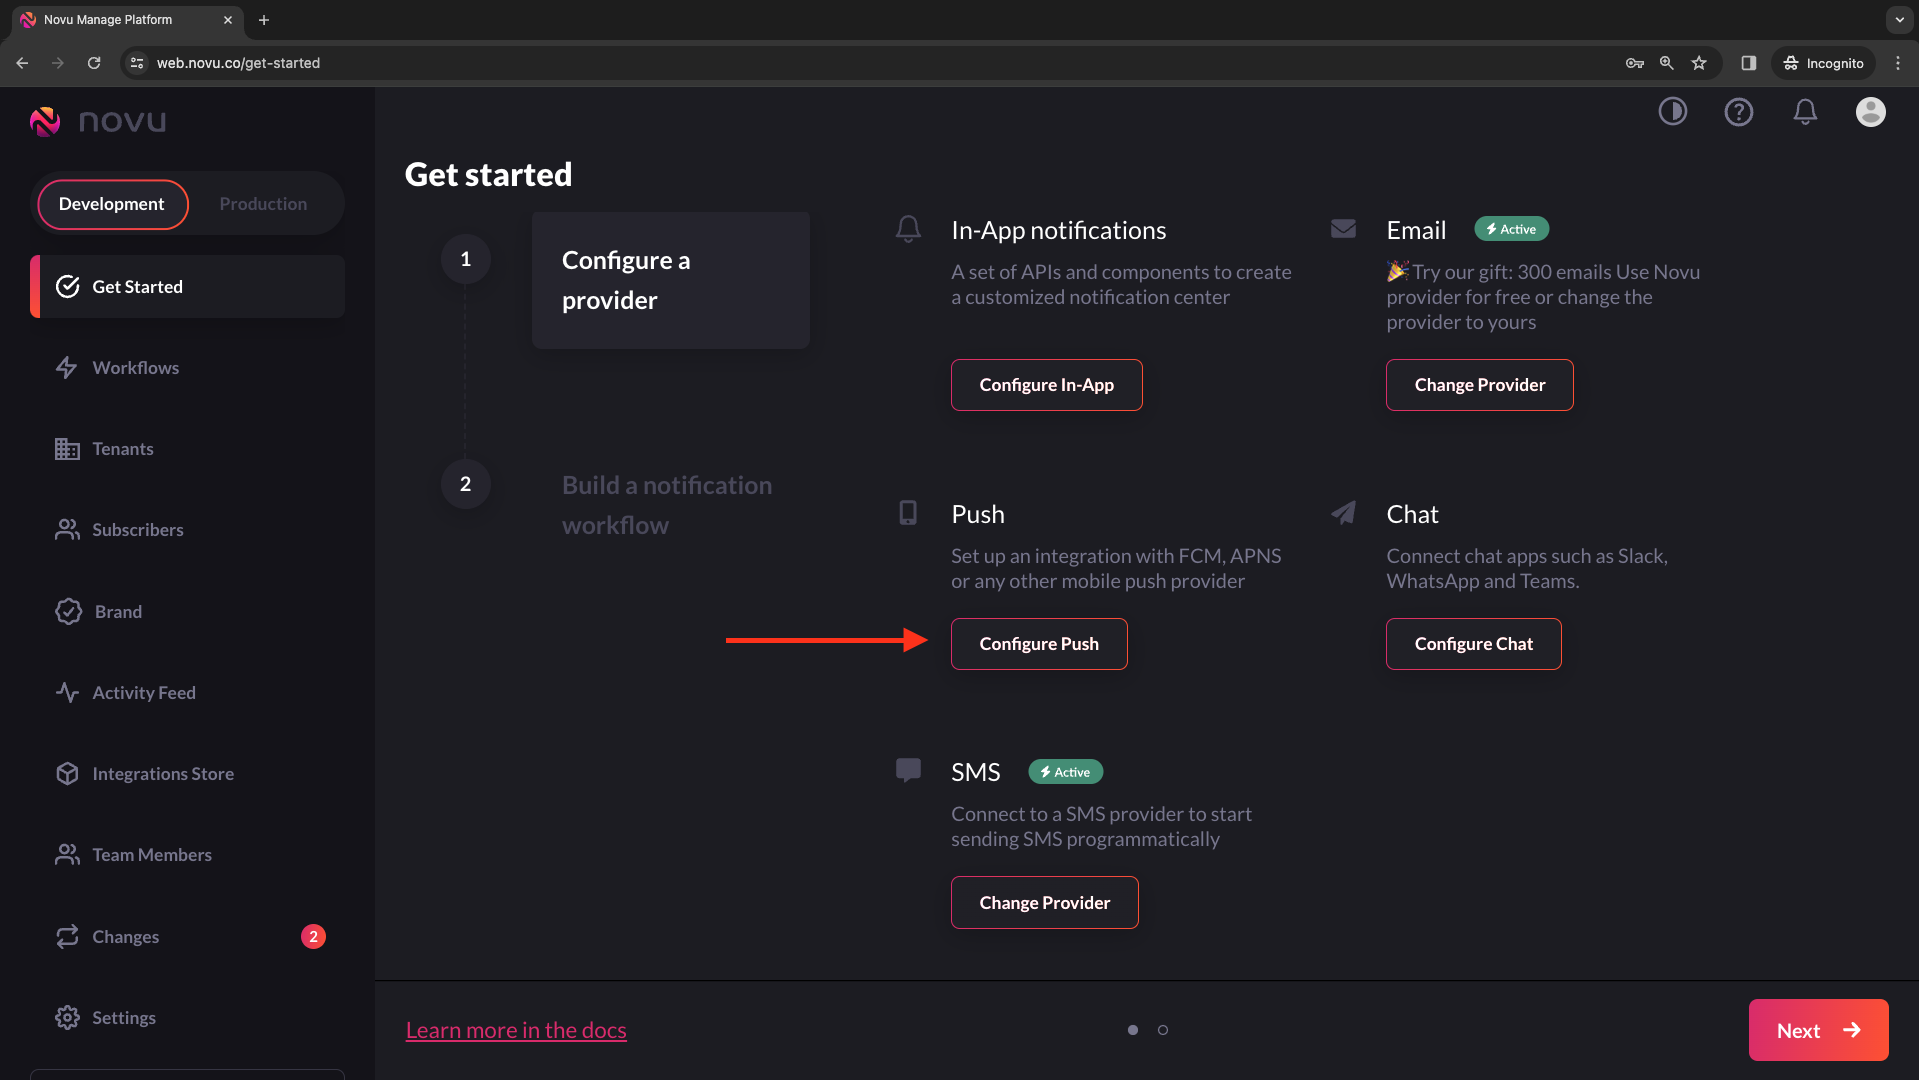
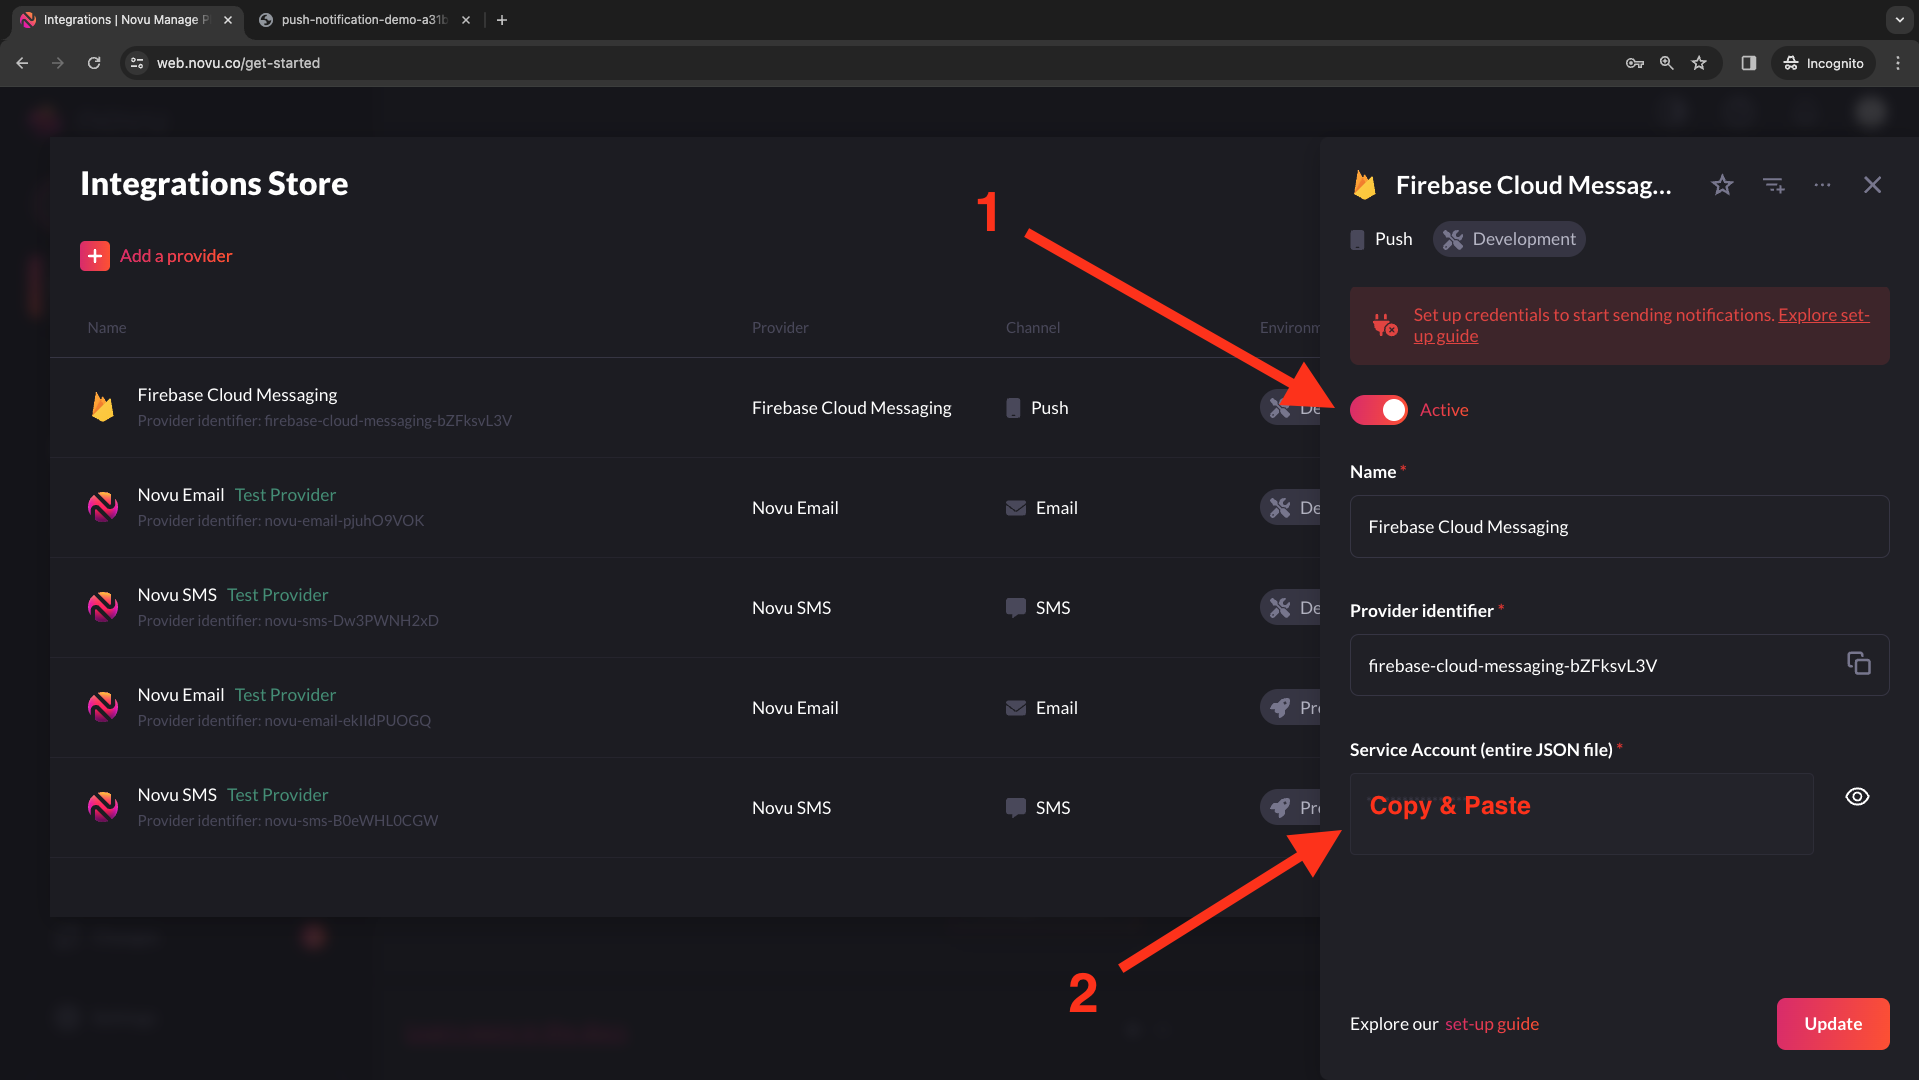
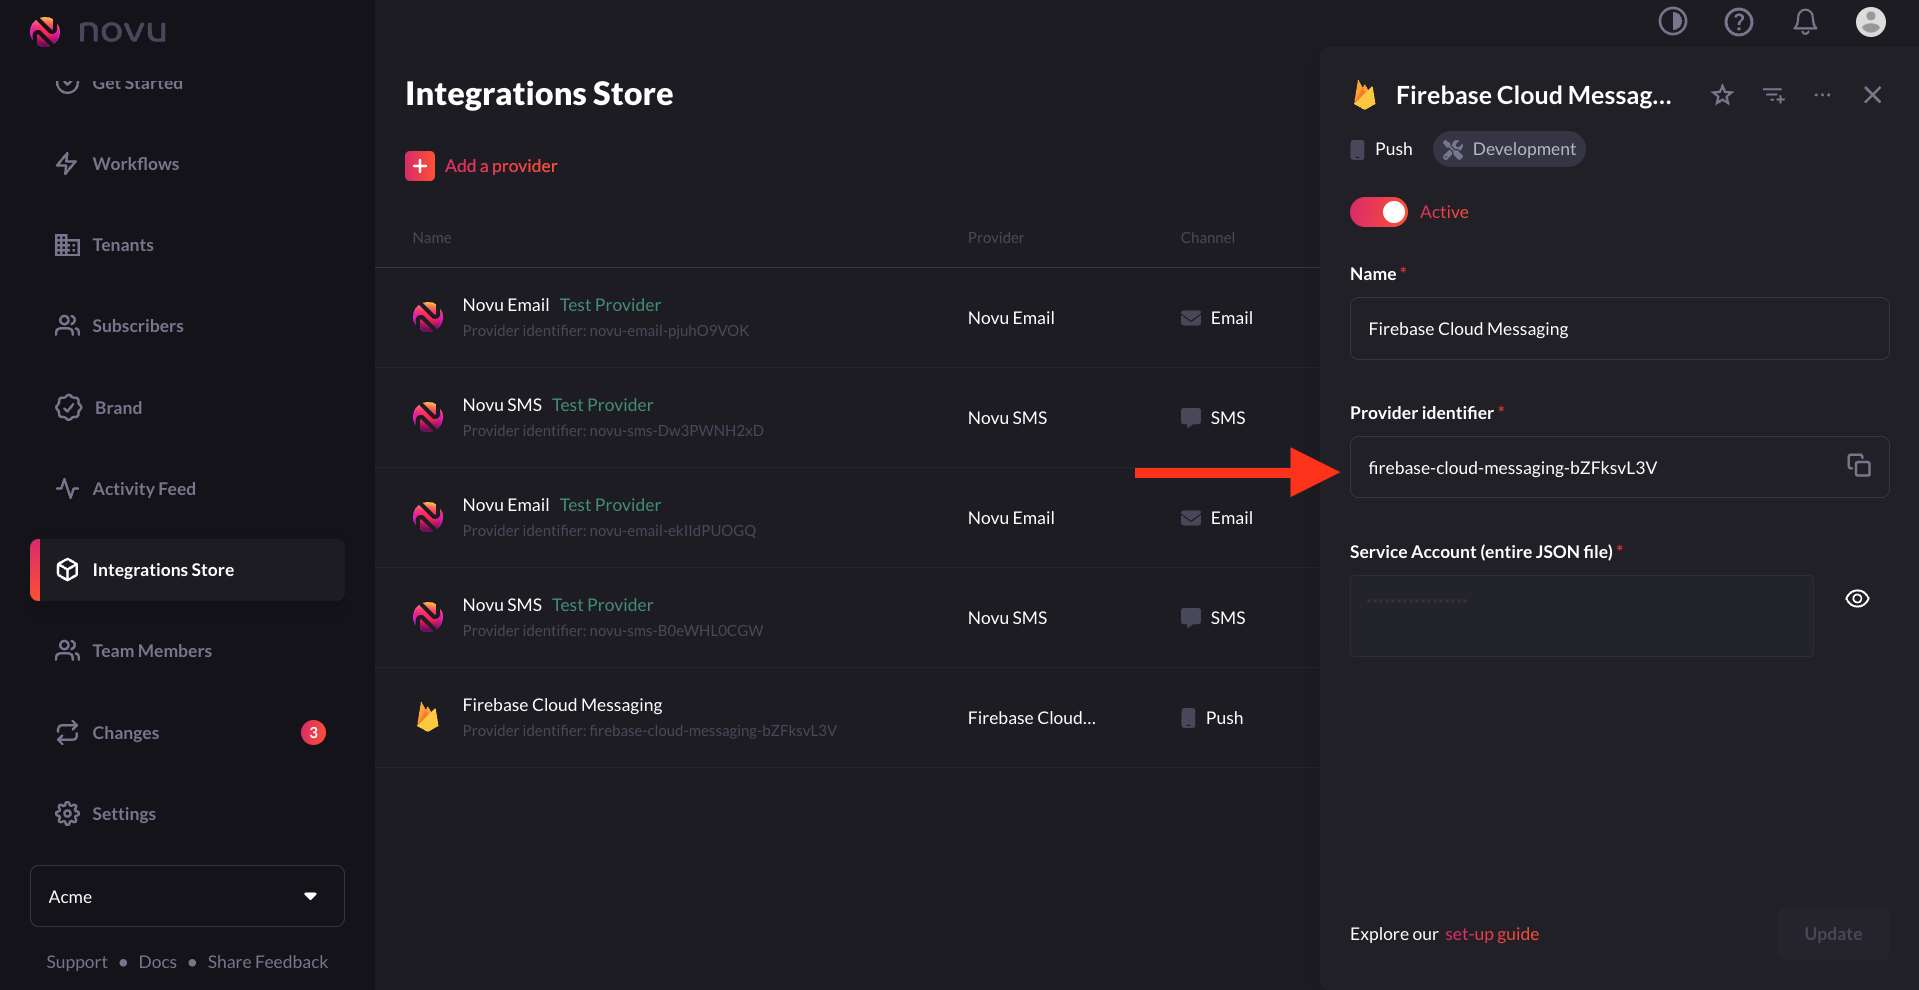
Integrations Store. Click on Add a provider.
Connect FCM as a Push Channel provider
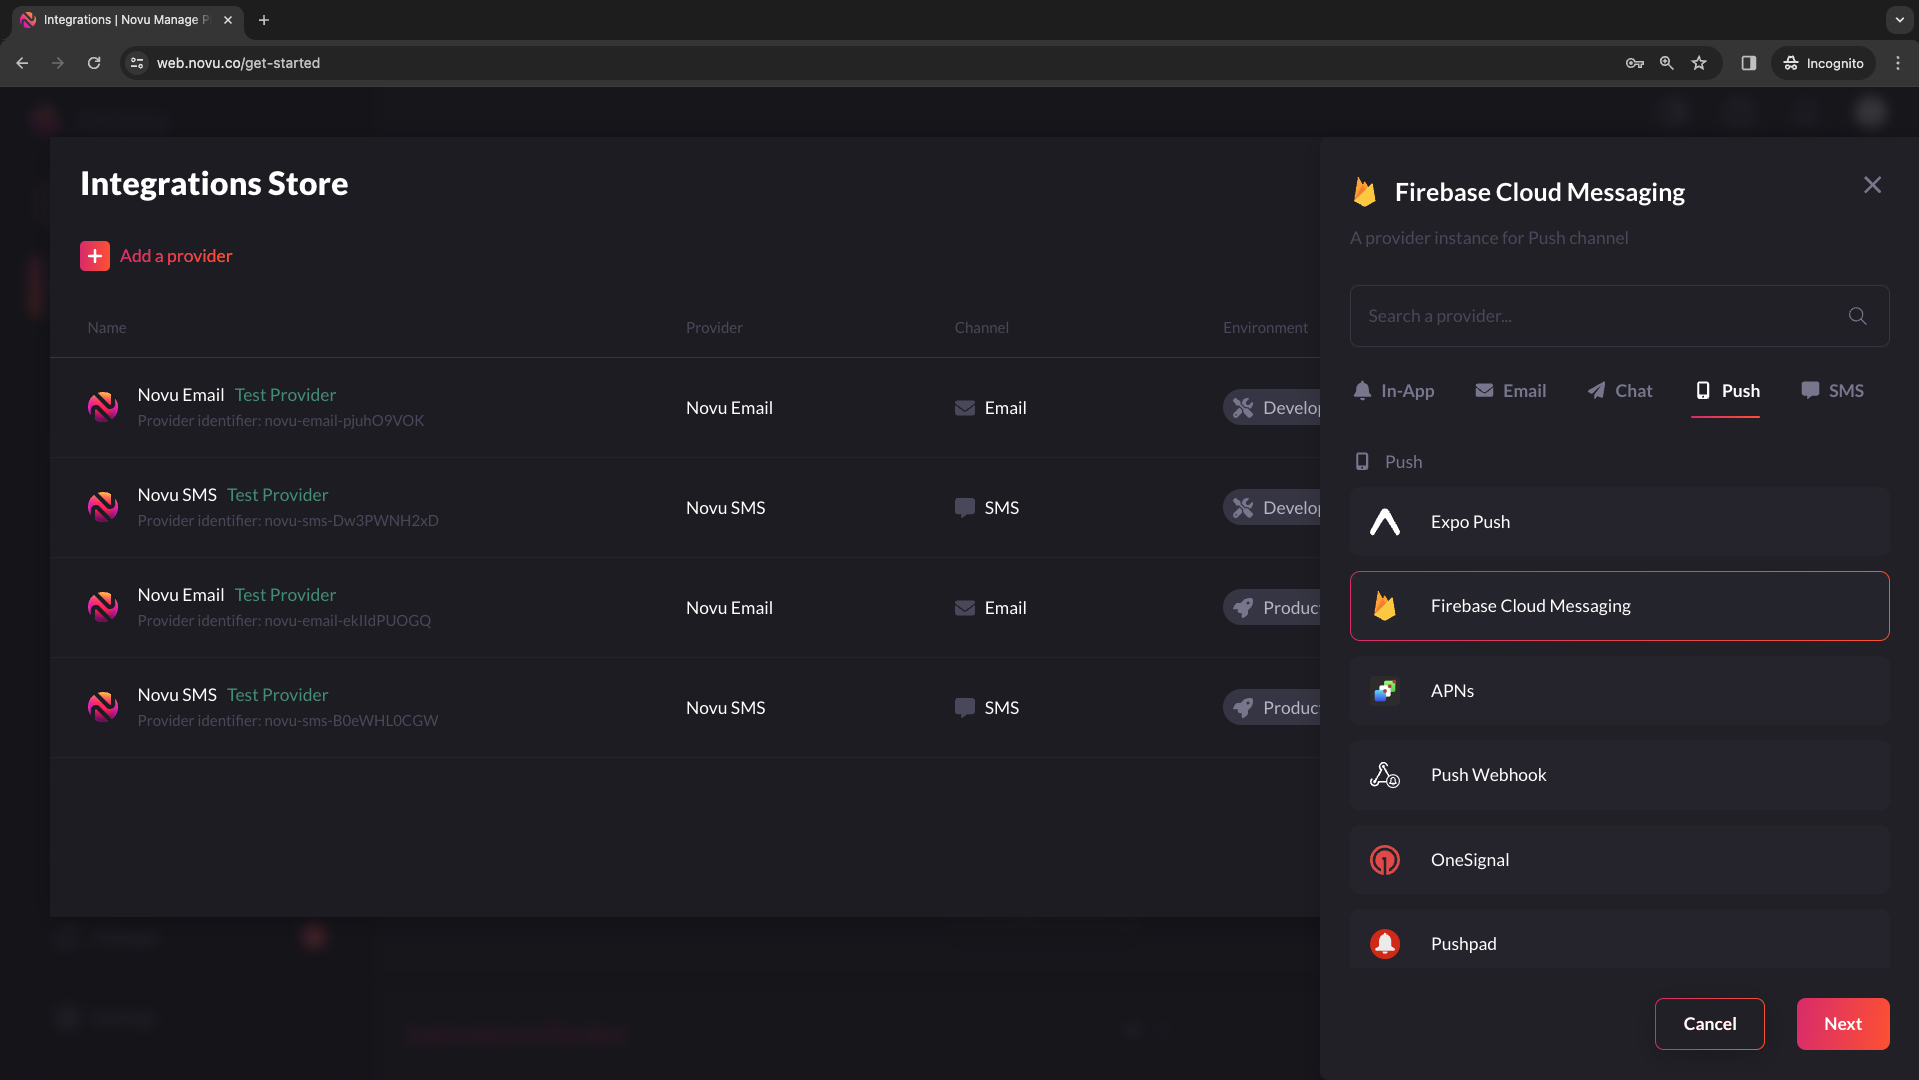
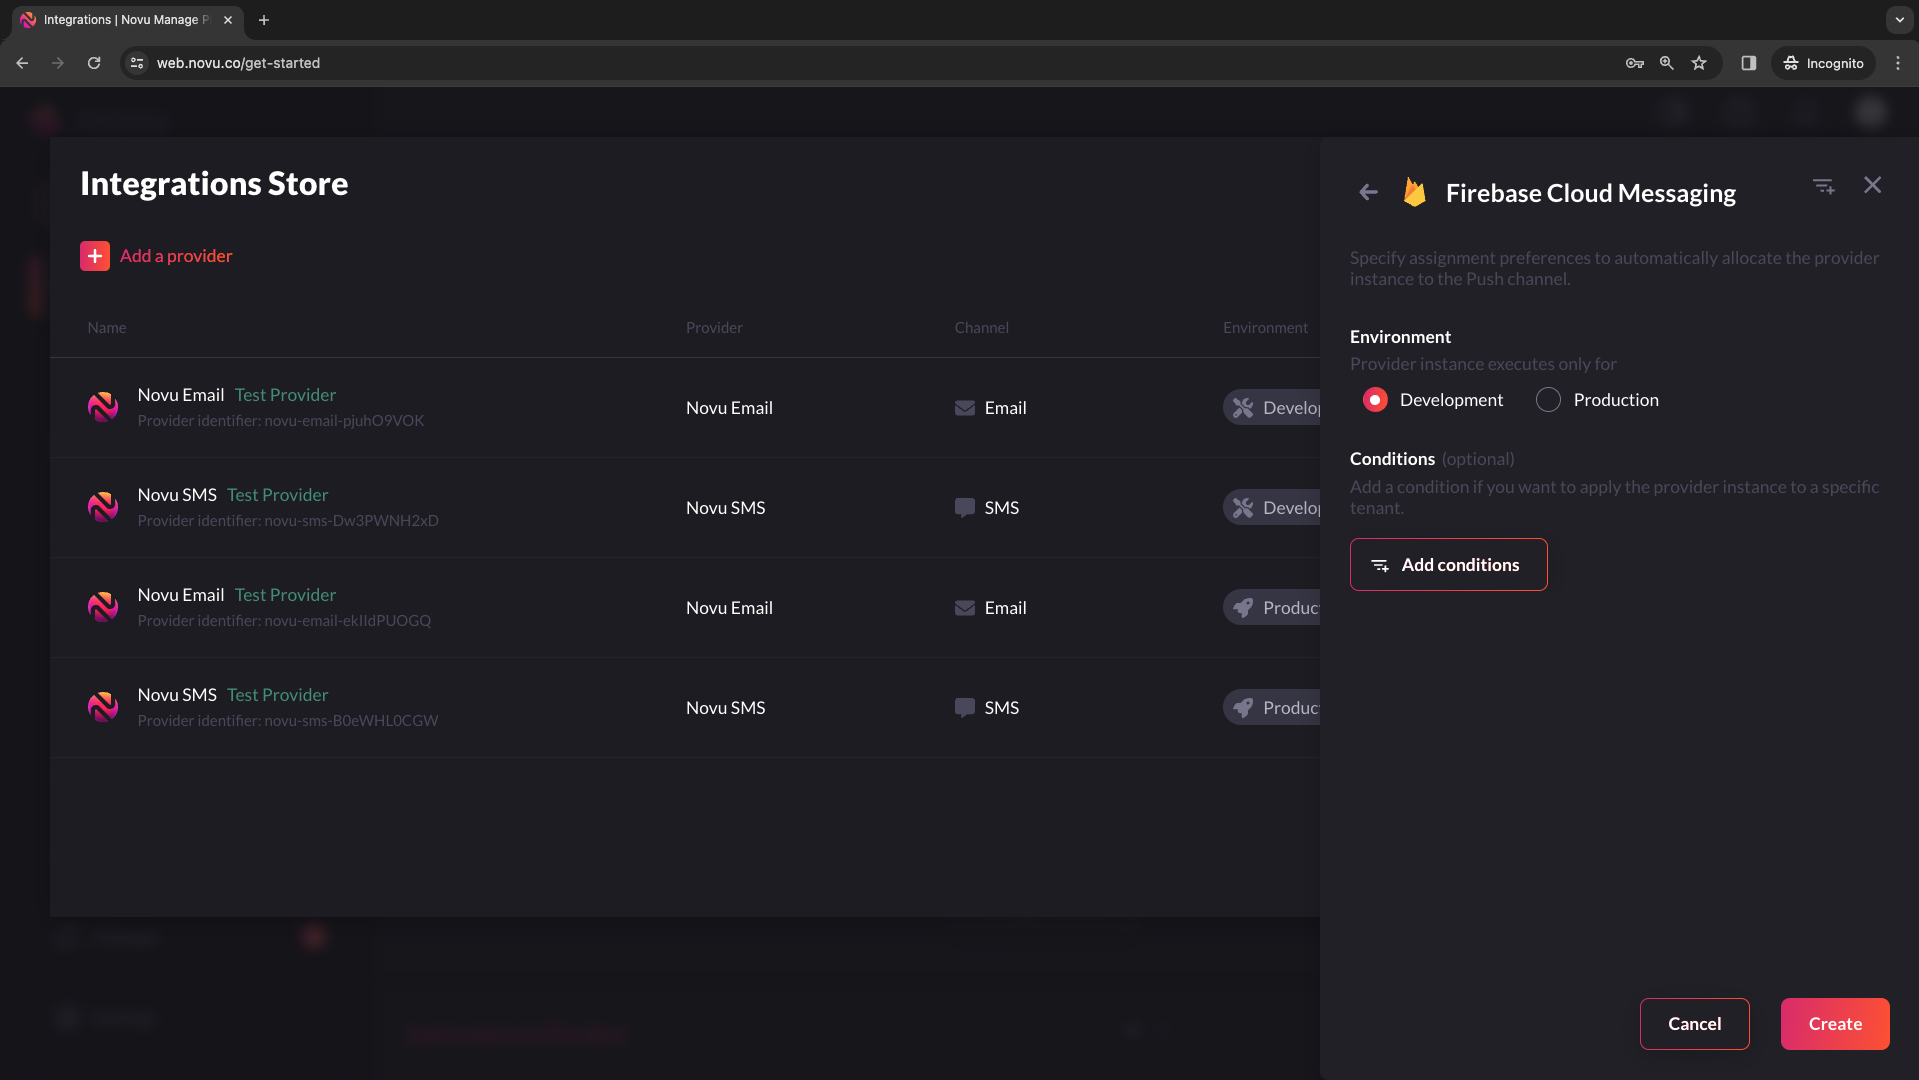
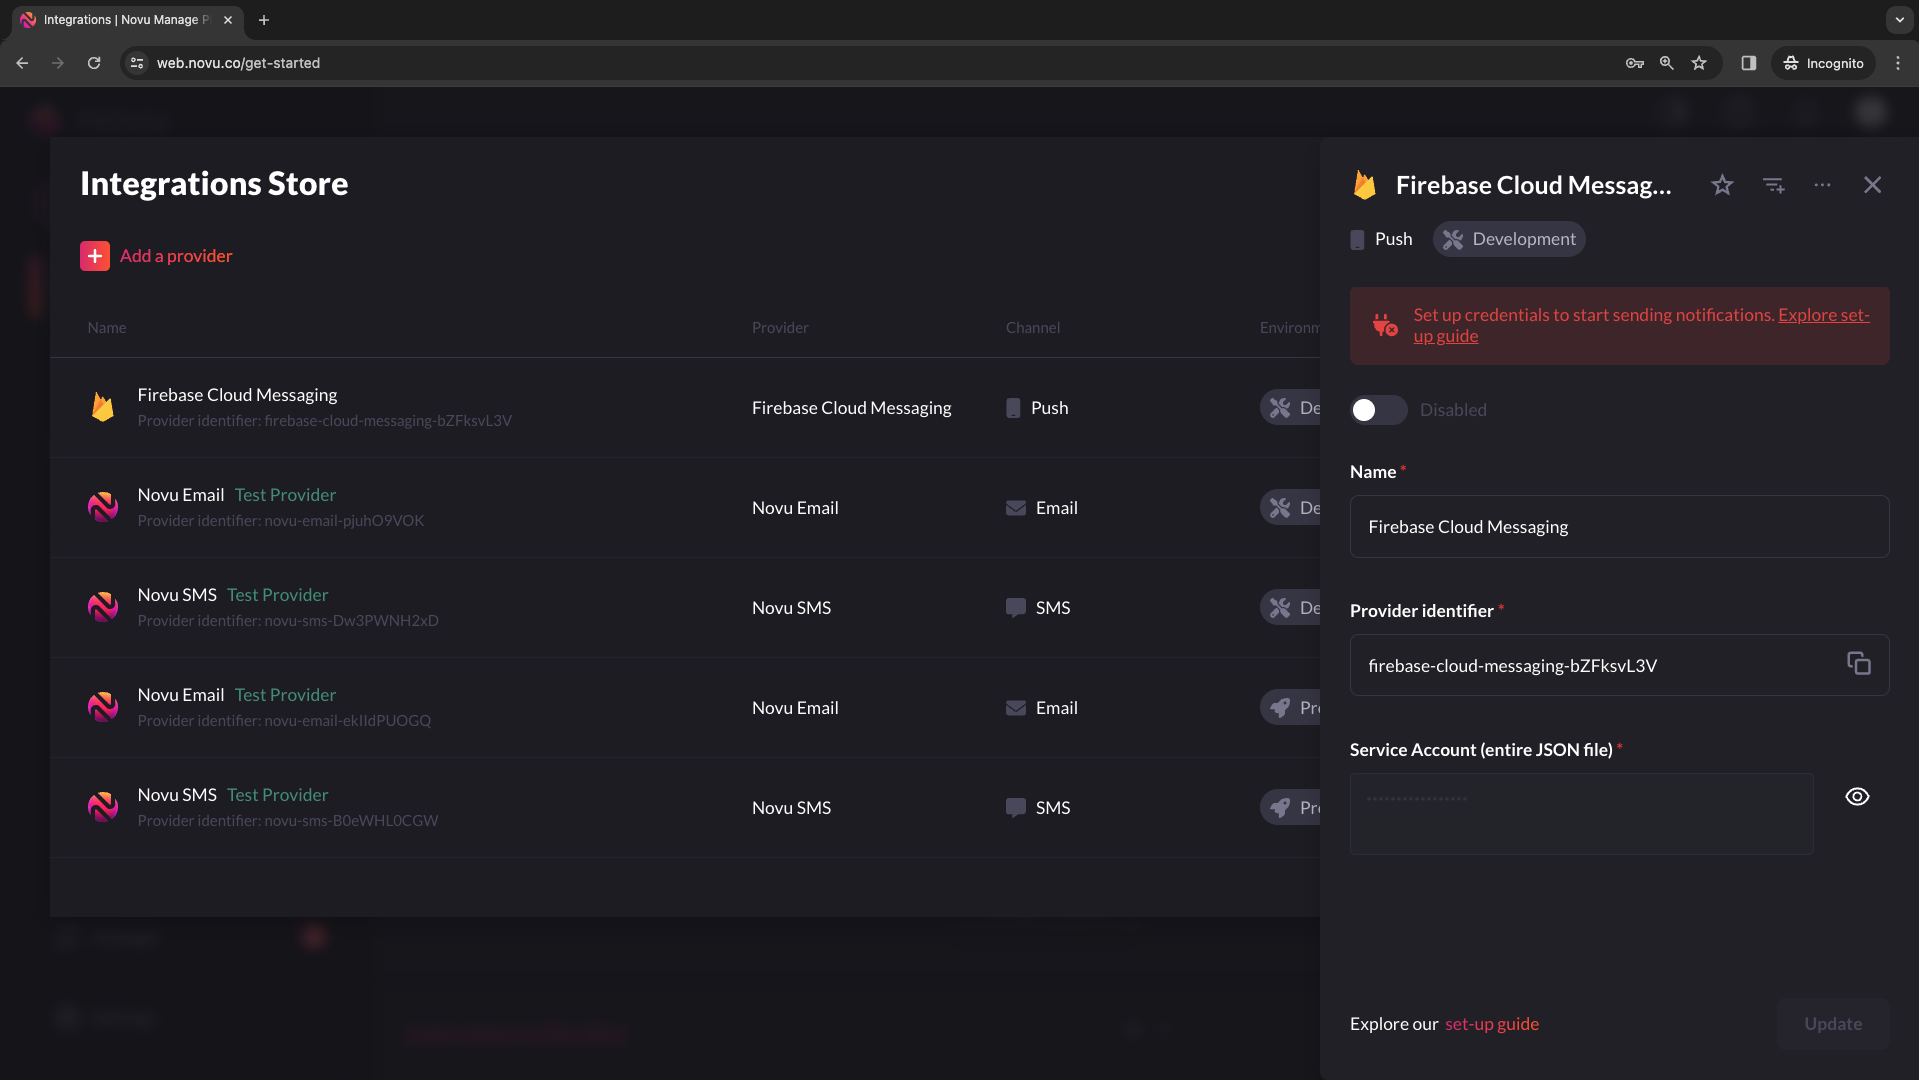
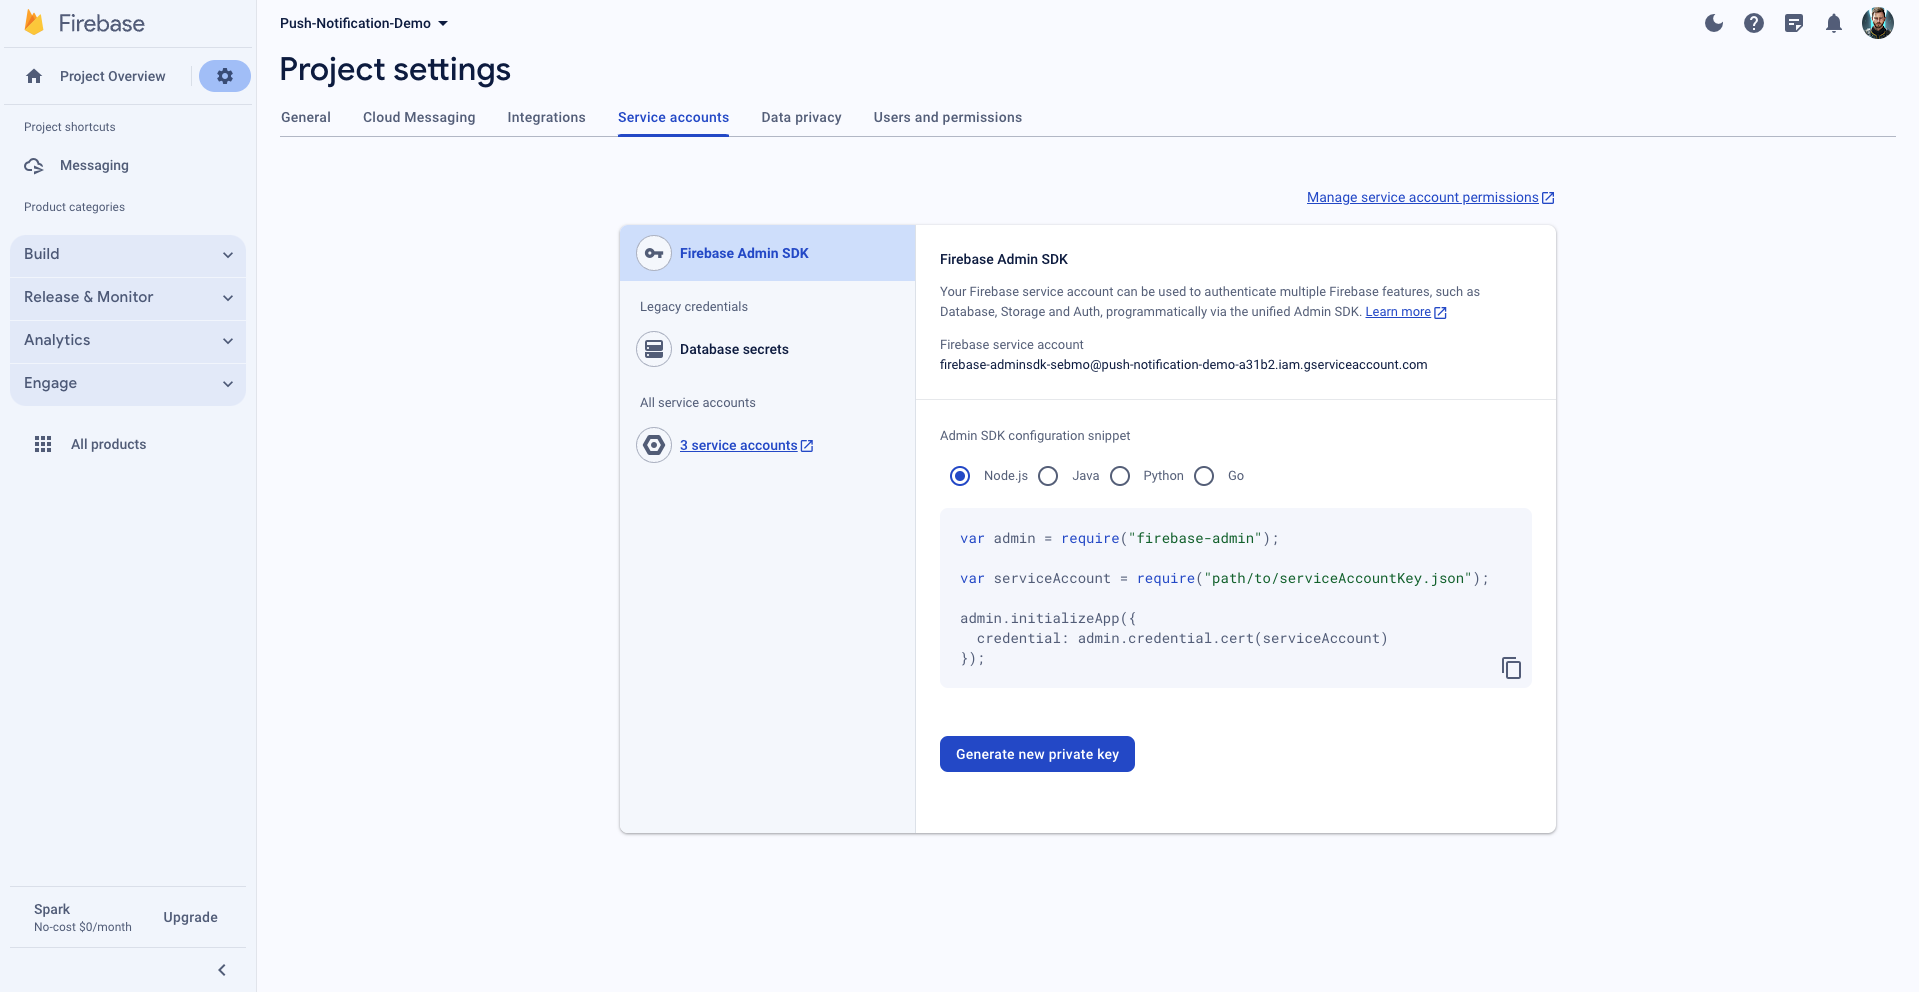
- Select your project. Click the gear icon on the top of the sidebar.
- Head to project settings.
- Navigate to the
Service accountstab. - Click
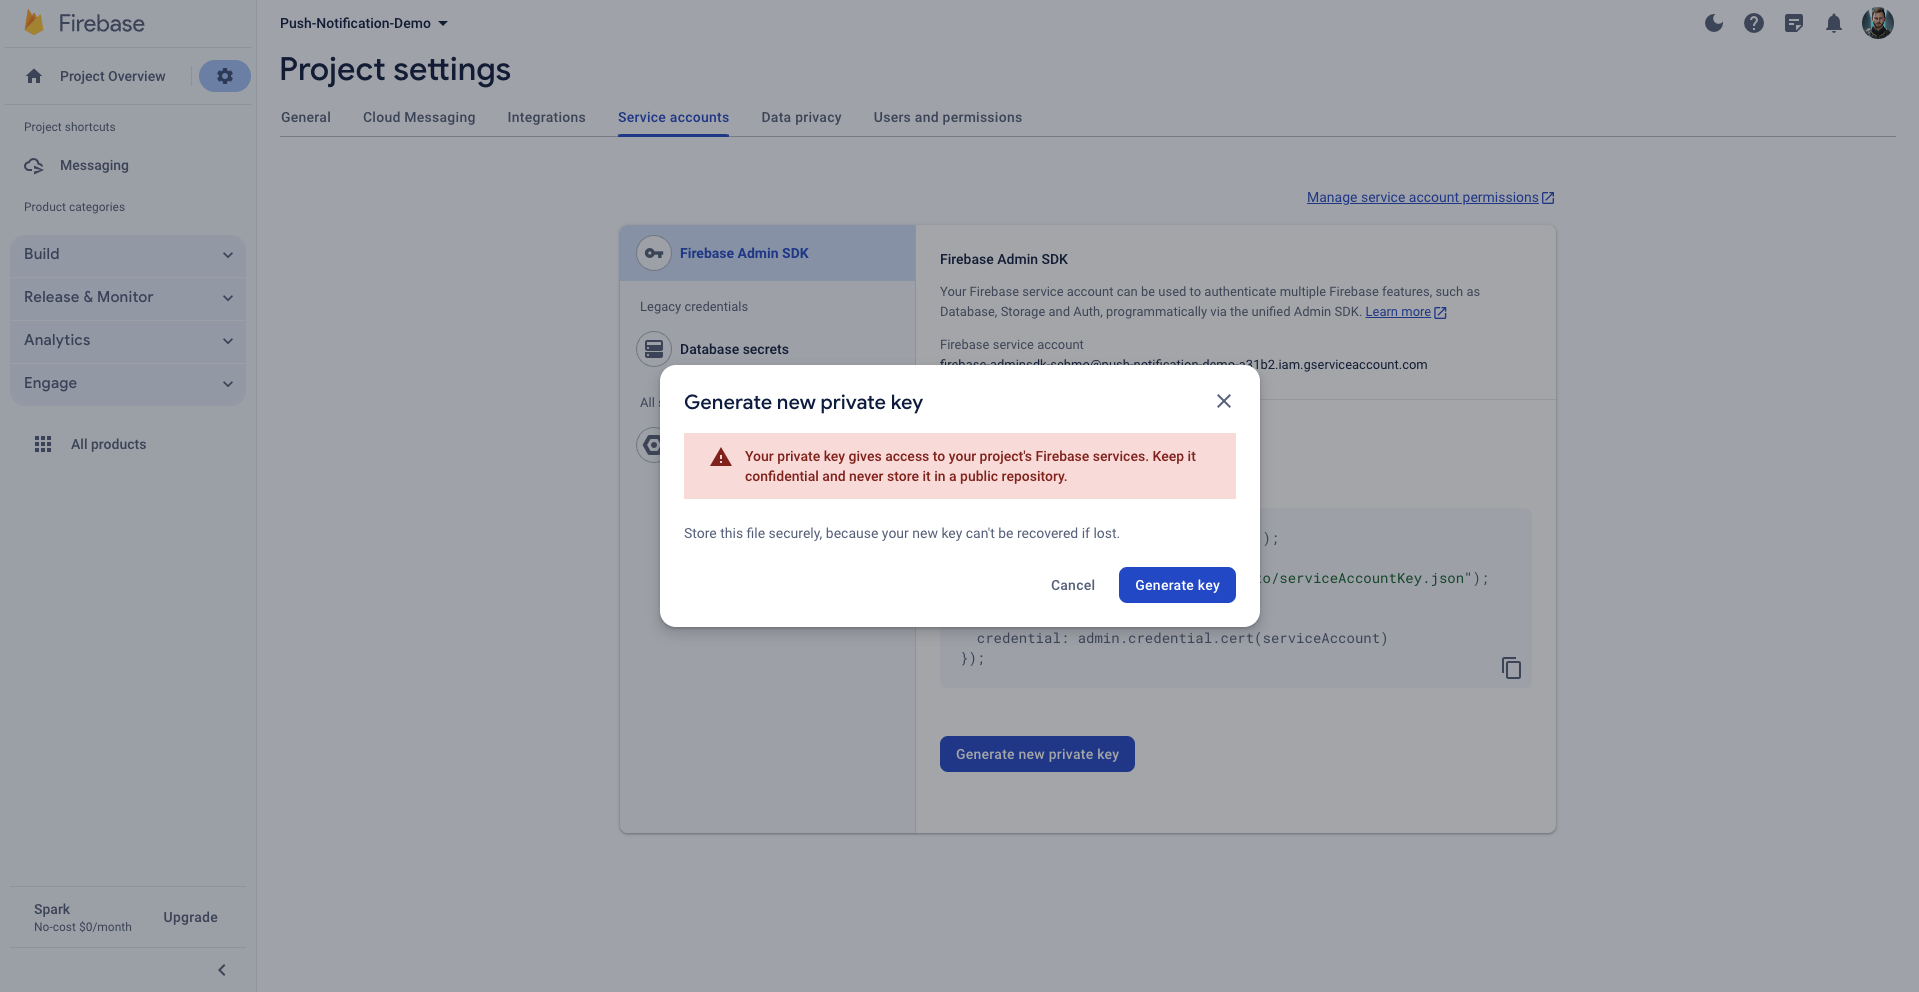
Generate new private key, then confirm by clickingGenerate key. - Click
Generate keyto download the JSON file. - Once the file is on your machine, paste the entire JSON file content in the
Service Accountfield of the FCM provider in the Integration store on Novu’s web dashboard.
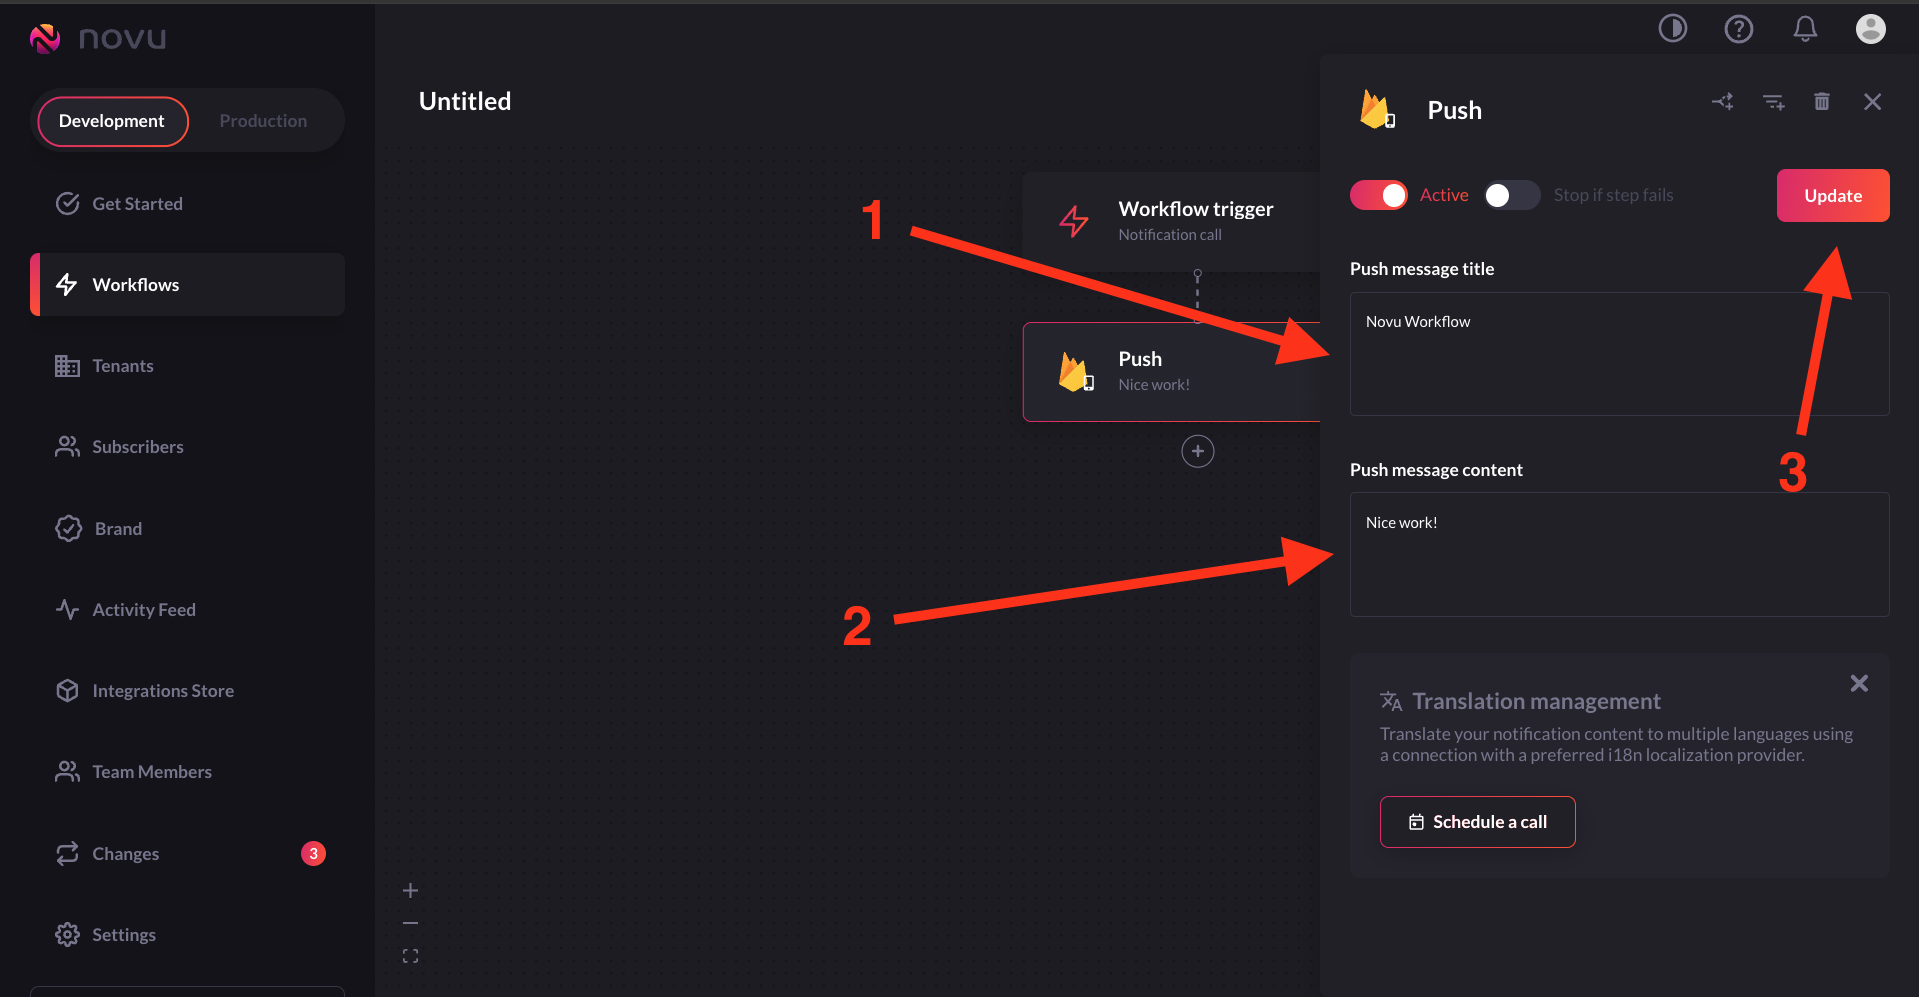
Create a Notification Workflow
In Novu, creating a workflow means establishing a blueprint for sending notifications within your app. This unified structure ties together email, in-app messages, SMS, push notifications, and chat into one entity. Each workflow has a unique name and identifier and includes customized content for various channels, using{{handlebars}} variables for personalization.
This ensures consistent platform notifications and allows dynamic adjustments for individual subscribers, scenarios, and use cases.
We need to fire notifications to subscribers. So, let’s create a subscriber!


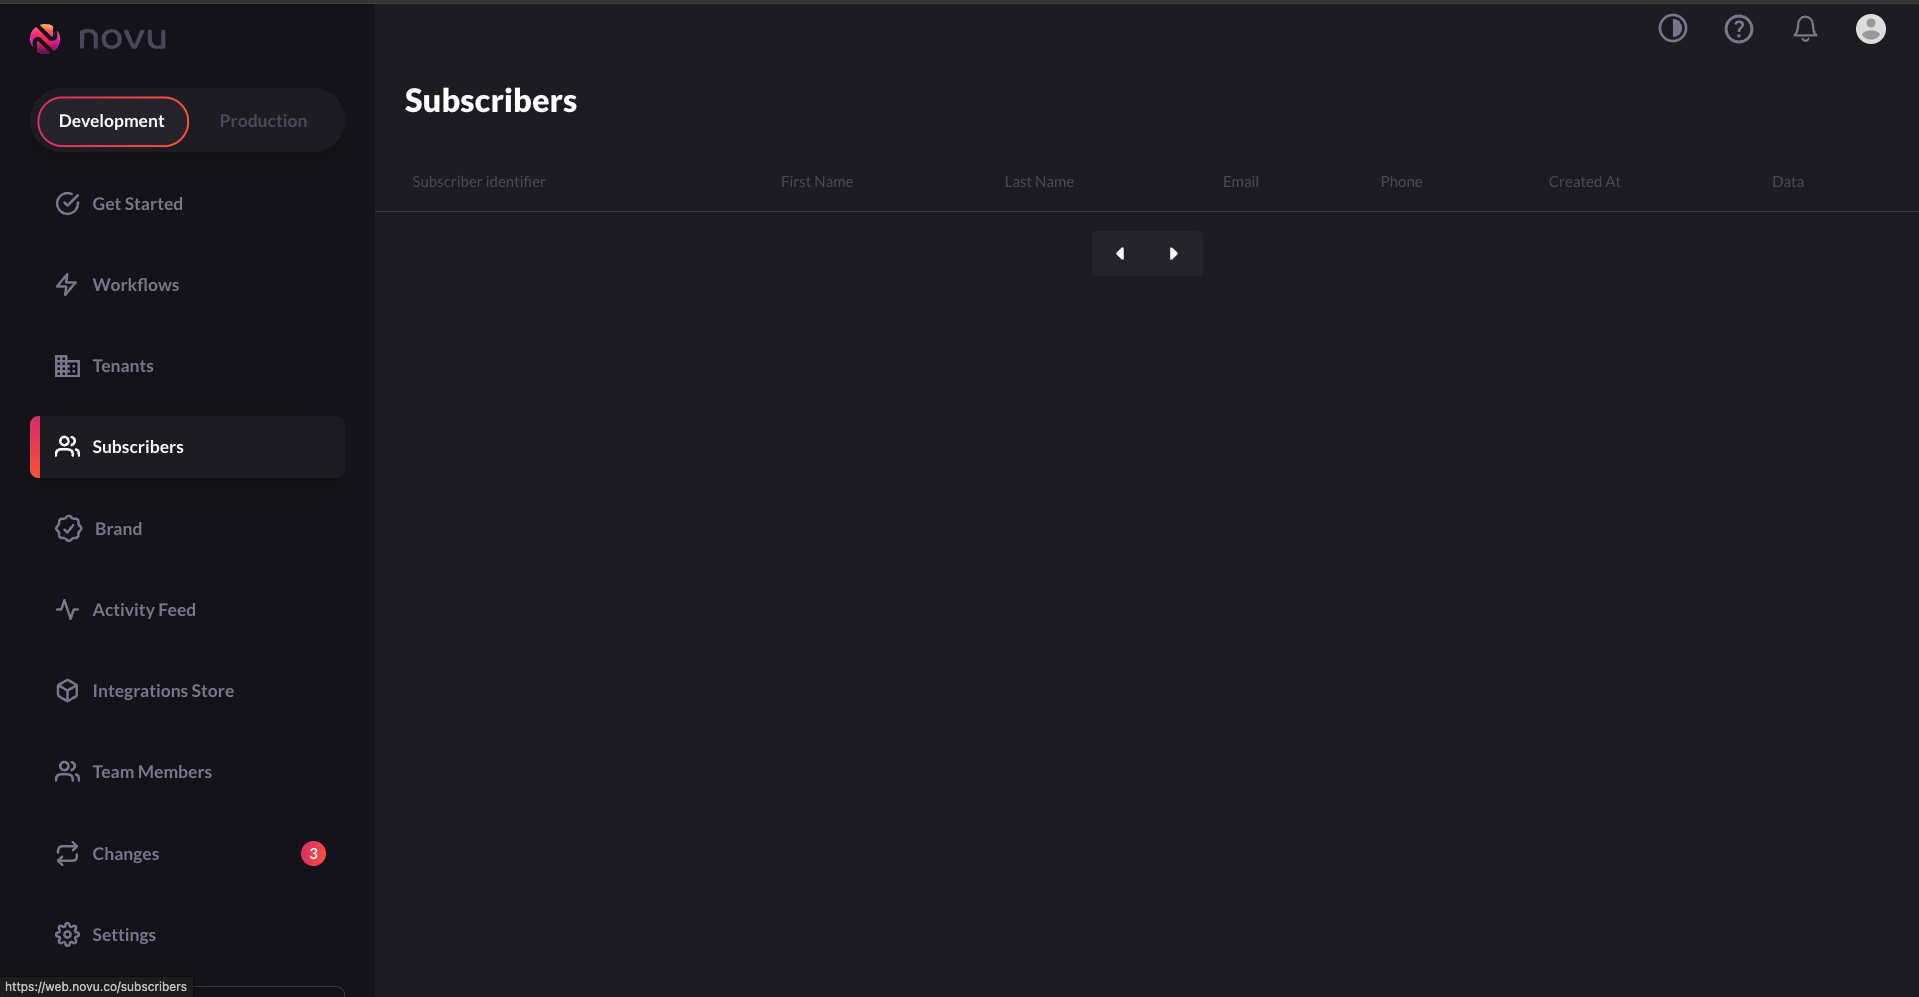
Create A Subscriber & Update Credentials
A subscriber is essentially the recipient of the notifications sent through Novu’s system. When you create a subscriber, you’re setting up the necessary information for Novu to send targeted notifications to that individual. You can see the list of subscribers in theSubscribers section of the Novu dashboard.
Sending a Push Notification to a Device(Android/iOS) with Novu
To send a notification with Novu, you are actually triggering a notification workflow. You have the ability to test the trigger using the Novu UI or by calling Novu’s API. Trigger a workflow via the API Insert thetrigger identifier as the name in the API request below:
Dynamic Content
When we were creating the first workflow, we “Hardcoded” the content of the notification. Now, we will determine the content when calling the API.- In the workflow, we should change the values of the
titleand thebodyto{{title}}and{{body}}. That way, we could insert values through the payload of the API call.
- Add a
payloadobject to the API call.
trigger identifier as the name in the API request below:
Handling Data Type Messages
With FCM, you can sendNotification and Data messages. We have handled sending notification messages. Let’s handle data messages.
Data messages contain user-defined custom key-value pairs. The information is encapsulated in the data key. The app can do whatever it pleases with the data once it’s received by the device.
Via the Trigger API call
Sound of a notification
You can use the name of a sound file in your app’s main bundle or in the Library/Sounds folder of your app’s container directory. Specify the string “default” to play the system sound. Use it for regular notifications. For critical alerts, use the sound dictionary instead. The code below works for iOS devices:Priority for notification
If you omit this header, APNs (iOS) set the notification priority to10.
- Specify
10to send the notification immediately. - Specify
5to send the notification based on power considerations on the user’s device. - Specify
1to prioritize the device’s power considerations over all other factors for delivery and prevent awakening the device.
high or normal for the priority of the notification message.
Sending Push Notification With Image
Up to this point, your notifications have all contained only text. But if you’ve received many notifications, you know that notifications can have rich content, such as images. It’d be great if your notifications showed users a nice image related to their content. Once again, Firebase makes this super simple. To show an image in push notifications, you’ll need to create a Notification Service Extension. We handled it earlier in this guide during the Apple setup. For reiteration, follow this guide to ensure it is properly set up for iOS devices. When making the API call, we should include:- “mutable-content”: 1 inside the “aps” object.
- “image” in “fcm_options” object,
- URL address of the image.